
If you are following along in my series on Managing Analytics Assets with Microsoft Azure DevOps, you read the post – 5 Questions to Ask and Answer Before Setting Up Azure DevOps. In that post, I asked you to think about which work item types you want to work with and which process. This week, I’m diving into the details of the process. I’ll show you how to set it, change it, and we’ll talk about why you should clone processes in AzureDevOps. Read on to learn more.
Where to Find the Process
In An Existing Project
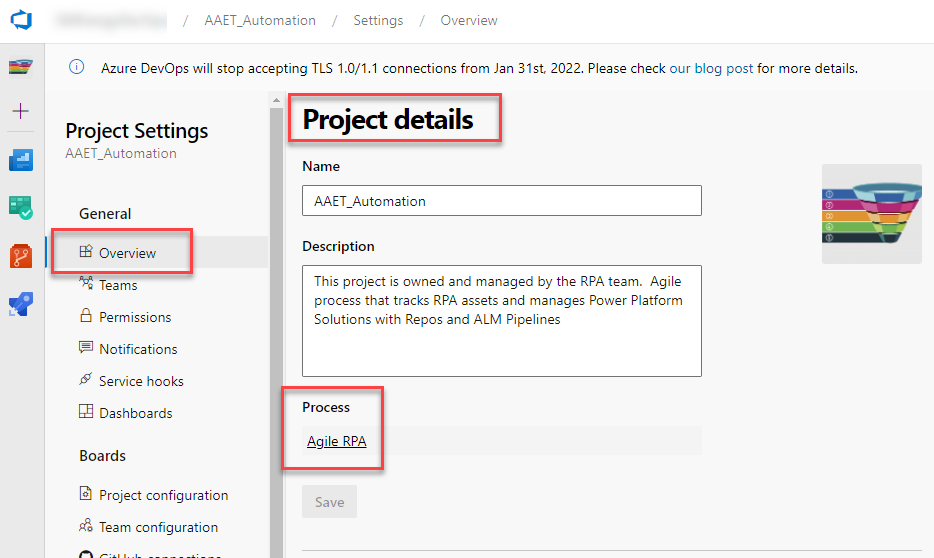
If you have already set up a project and aren’t sure which process you are using, go to Project settings > Overview. Clicking on the hyperlinked process name will take you to Organization Settings, which is where process changes actually happen. I’ll cover how to change the process in just a bit.
In a New Project
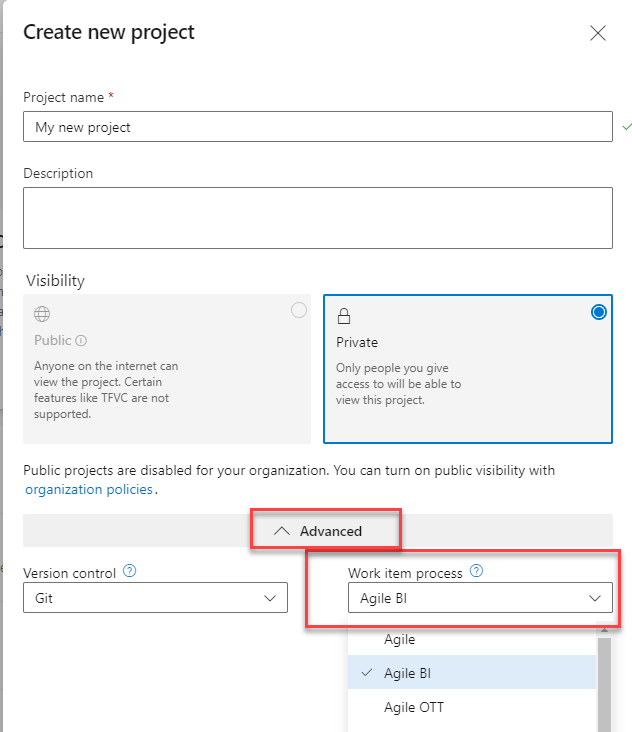
When creating new projects, click on the Advanced tab. Then, you’ll see a drop-down under Work item process. It’s super easy to fly thru the Create new project dialog and not purposefully set the process. If you don’t set the process, ADO sets it for you using the organization’s default process, which is Basic unless an administrator has changed the default.
The Process
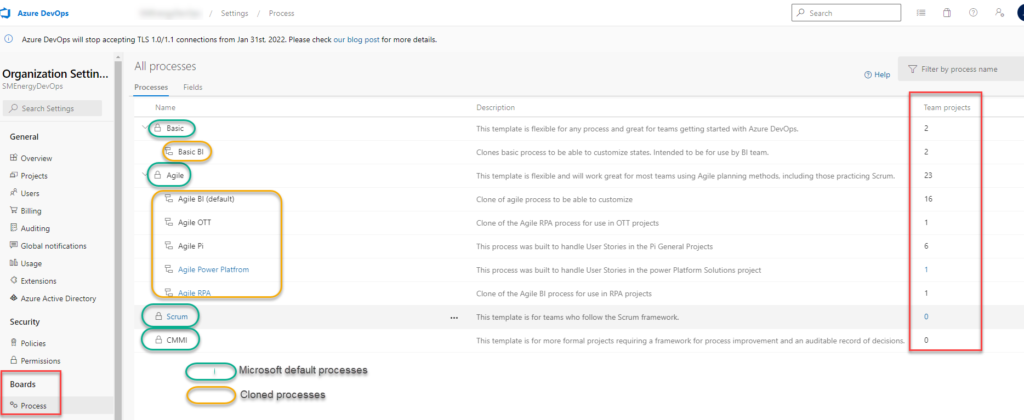
Details on all processes appear in Organization Settings > Boards > Process. Notice the Microsoft processes, denoted with a lock icon. These come with ADO. Cloned processes live under the Microsoft processes, kind of like a hierarchy. MS terms them “inherited processes”. The screen also shows how many projects use a given process, which is very important. I’ll explain as we talk about cloning a process.
Why Clone a Process?
The first reason to clone a process is to unlock the ability to customize ADO content. As you can see, the Microsoft processes appear with the lock icon because you cannot change anything related to the process. This includes the work item types and content shown with each work item (and probably other stuff too). But, when you clone a process, you unlock customization. I promise. You’ll want to customize.
But more importantly, when you customize a process, those changes will be deployed to any and all projects using that process. That’s why knowing how many projects are using a process is important. Let me show you an example.
I created a clone called Basic BI specifically for the BI team. It’s visible in the screenshot above. Then, I customized the heck out of it. I added several tabs to the Epic – Asset Details, Maintenance Details, Business Details. I also created custom fields and populated the tabs with my new fields. This worked because the BI team is the only team using the Basic BI process. If other teams use that process and I make changes to it, all projects connected to the process are impacted. And you never want to break someone else’s project.

How to Clone Processes
So, now that you know you want to clone processes, let me show you how.
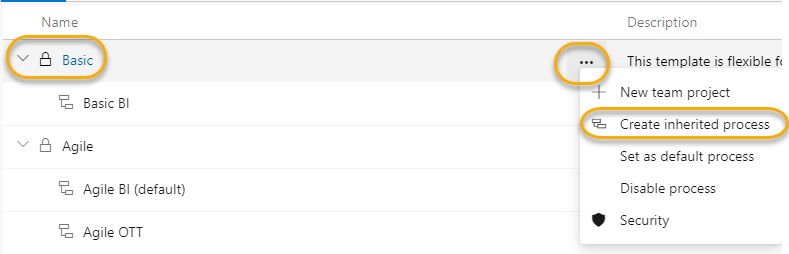
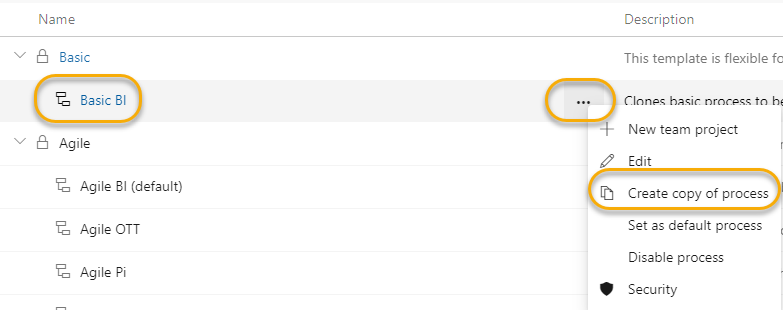
- Go back to Organization Settings > Boards > Process.
- Click the triple dots in the same line as the process name and chose one of the options shown below. The menu options are slightly different if you are cloning a Microsoft process versus a process that has already been cloned.
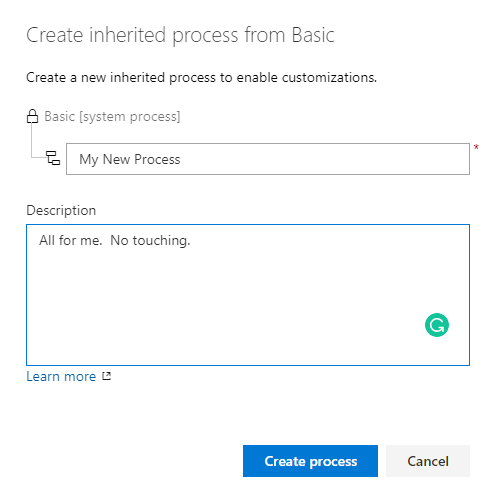
- Name the process, and I highly recommend giving it a description that indicates who owns/controls it and what it it for.
How to Change a Process
Now, what happens if you created a project and didn’t know that you should have set your process. Or, you thought you wanted basic work items but now you know you’re not basic?

The good news is that you can change the process used by an existing project, even if you’ve started configuring the project. The bad news is that you might have some rework. Don’t let that deter you though. Bulk changes in ADO are pretty easy (post forthcoming).
To change the process on an existing project….
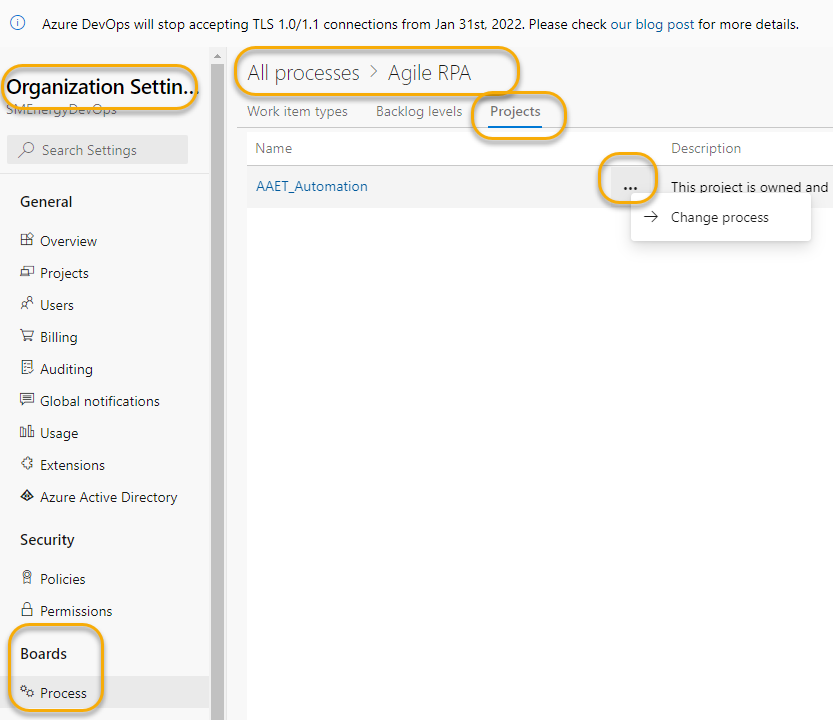
- Go to Organization Settings > Boards > Process.
- Click on the process your project is currently connected to.
- Go to the Projects tab.
- Click the triple dots next to your project name.
- Click Change process.
- Select a new process from the drop down.
- Click Save.
You’ll probably get some warnings about potential impacts. If your change modifies the work item types, like a change from Basic to Agile, there will be a good amount of rework.
Conclusion
And there we have it. Now you know why you would want to clone processes, how to do it, and how to change an existing process. Next week, I’ll talk about customizing work item types and working with boards. See you then!
Other Posts in This Series
- Managing Analytics Assets with ADO (why analytics need ADO)
- Azure DevOps Terminology and Structure (so you know what we are talking about)
- Questions to Ask and Answer Before Configuring DevOps (so you don’t have rework like I did)
- Configuring Azure DevOps (configuring the organization, team, area path, iteration)
Pingback: How to Customize Work Item Types in Azure DevOps » The Analytics Corner
Pingback: Use Azure DevOps Boards to Manage Analytics Assets » The Analytics Corner