Welcome to post number three in my Power Automate for beginners series. The first post explained how to navigate Power Automate menus. The second covered triggers and actions. This post provides useful information for your first builds based on what I struggled with when first learning Power Automate. Read on to learn more about building and developing in Power Automate.
Blog or Video
Some folks like to read. Others prefer to watch. Pick your poison. If you prefer to watch, please subscribe to my YouTube channel.
Building & Developing in Power Automate
Prior to Power Automate, I worked mostly with desktop applications. In many desktop applications, users access menus by right-clicking. However, Power Automate is a cloud-based application, so right-clicking doesn’t produce anything useful. When working in Power Automate, remember that you are interacting with a website, so its all left-click. Because I struggled with this, I’m pointing it out from the start. Okay, let’s go to the building blocks of Power Automate – dynamic content.
Dynamic Content
What Is Dynamic Content?
Dynamic content is the key to configuring actions in Power Automate. But what exactly is dynamic content and when do you use it? In the simplest terms, dynamic content is data produced from a trigger or action that can be used in subsequent actions.
- Both triggers and actions can produce dynamic content.
- Triggers and actions can use dynamic content.
- Most dynamic content is created by triggers or actions. Environment variables are a type of dynamic content created outside the flow that can be used anywhere in the flow.
- Dynamic content can be used anywhere in the flow after creation.
Don’t worry about environmental variables now. The reason I mention them is simply to point out that it’s possible for both triggers and actions to both produce and use dynamic content.
How To Locate Dynamic Content?
Users access dynamic content from the blue Add dynamic content link. Sometimes the link doesn’t appear until you click in the action first. Then, both the Add dynamic content link and the menu pop up. Unfortunately, you can’t move the menu around. It is anchored to the action, and you can only scroll to move its position on the screen.
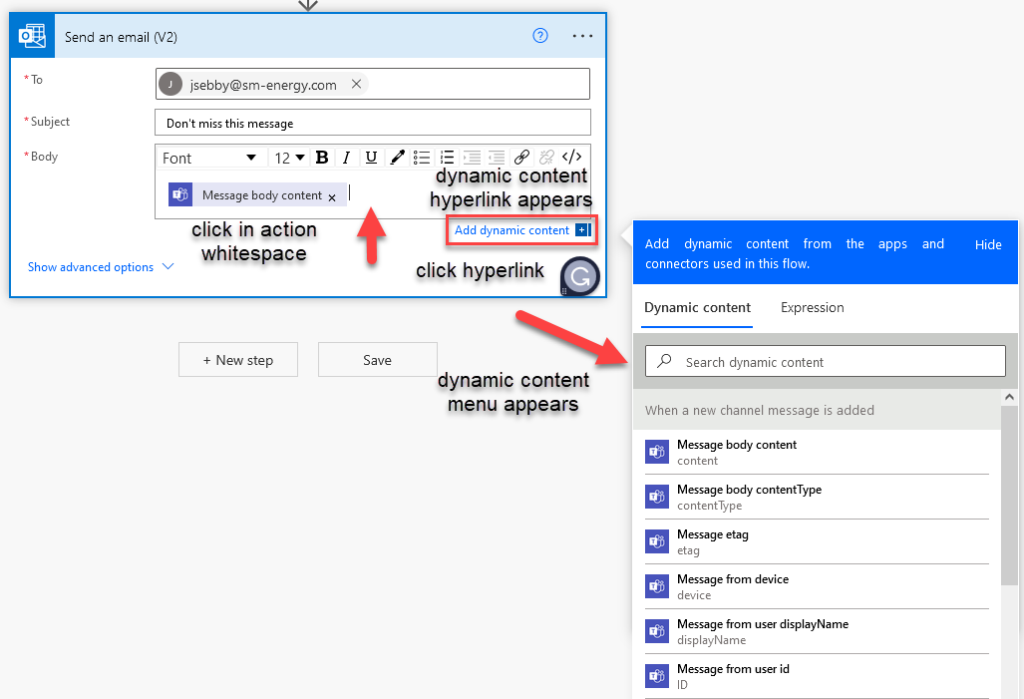
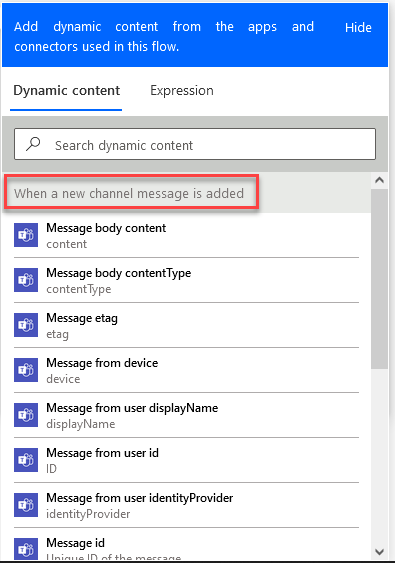
Dynamic content appears under a header equal to the name of the action that generated it. As your flow grows in the number of actions, so will the list of dynamic content. When that happens, make sure to use the type to search functionality above the header.
So what can you do with dynamic content?
What Do With Dynamic Content?
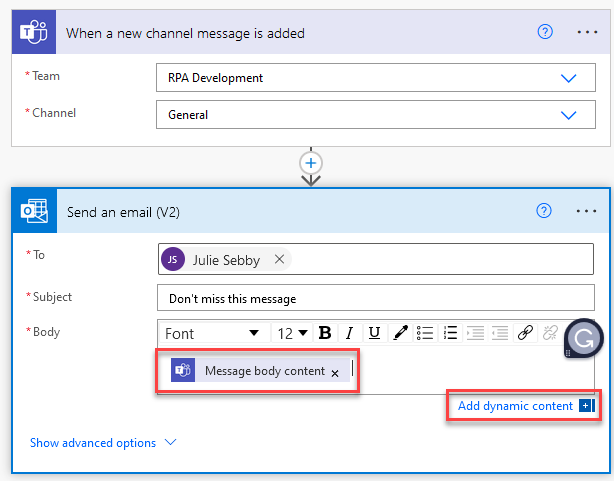
Let’s take a look at an example. In the flow shown below, I use a Teams trigger to kick off the Outlook action Send an email. When someone posts in the RPA Development team, in the General channel, I will receive an email. Because I have configured the Send an email action with dynamic content from the Teams trigger, the body of the email will be the message from Teams. I configured the flow like this…
I messaged Teams.

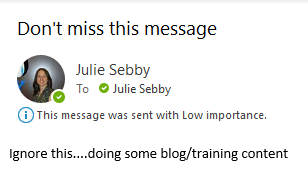
Outlook sent me this email.
In addition to being able to use the Teams message, I could also use the message id, the importance of the message, or a message summary.
So, dynamic content is/are the building blocks of Power Automate actions. Each trigger and action comes with its own collection of dynamic content. Once you become familiar with the concept, you’ll look to build flows around available dynamic content. It will make building Power Automate a breeze. Next, let’s talk about naming actions, as this is an important consideration in building flows.
Naming Things
I’ve written before about just how difficult naming things is. Power Automate is no exception. When naming actions, there are several important considerations. But first, how or where do you rename an action?
Renaming an Action
Click on the three dots in the top right-hand corner of a trigger or action to pull up a menu. The option to rename lives here. When I first started working in Power Automate, I used the action name to take notes and track my work. Over time, I found this was not a good practice, which I’ll illustrate by showing you where and how action names are used.

Action Names in Dynamic Content
First, the name you give the action or trigger appears in the dynamic content menu. This is helpful as long as actions have clear and distinct names.

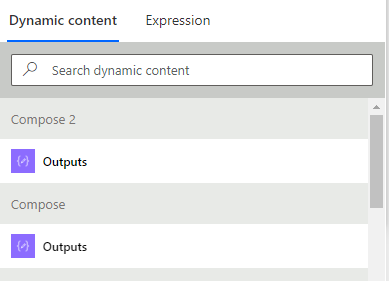
If you don’t rename an action and then add another action of the same type, Power Automate will add a number to the name…

…which will make picking out the action’s dynamic content more difficult and error-prone. This is also a good illustration of why you shouldn’t duplicate names or create similar names.
Action Names To Describe a Flow
As you can see above, by default, the action name equals the action. When I first started building in Power Automate, I often followed someone else’s flow trying to mimic their actions. But, when the developer completely renames an action, I had no idea which action they used. Because of this, in my own builds, I started leaving the action name and following it with a few words that differentiate the action or trigger. I thought this would make it easy for people to follow my work. But, this is also not a good practice.

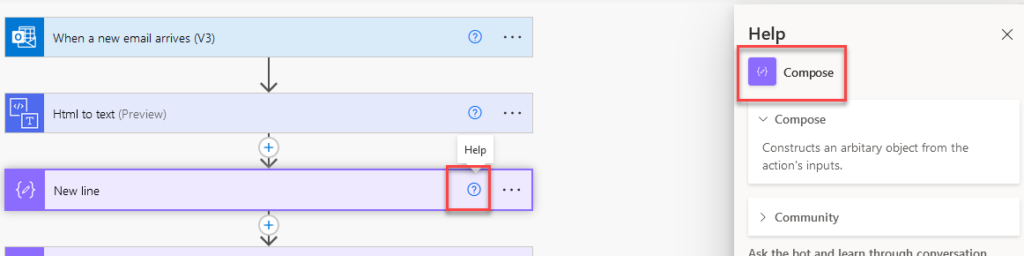
Since my early Power Automate days, I have learned you can find the name of the action by clicking on the question mark button. This will open the Help menu, which will tell you what the action is. Thus, my original problem of not knowing what the action was can be easily solved.
Action Names Appear in Expression Syntax
It’s also not a good practice to add a description after the action name because the full name of the action appears in Power Automate expressions. We haven’t covered expressions yet, but it’s important to know this now.
For example, the flow shown below uses two Compose actions. The first Compose gets a date from the subject line of an email. The second Compose changes the formatting on the date. Observe how the expression syntax references the getDateFromSubject action. Imagine how ugly and hard to understand the expression would be if the action name were longer.

Furthermore, if you put spaces in the name, they must be replaced with underscores when writing expressions. If you are typing out the expression, you must remember this to switch spaces for underscores. Or, Power Automate will do it automatically if you use the dynamic content menu to build the expression. Thus, it’s better not to put spaces in the action name and to apply a consistent case convention, even though I wasn’t consistent in the screenshots below.
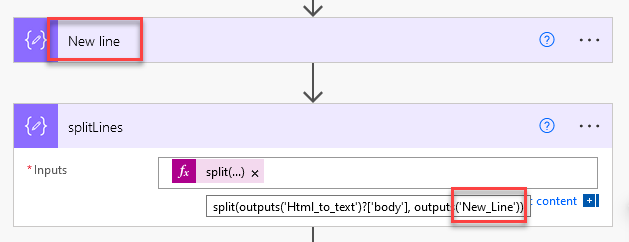
Finally, as I write this, I’m observing that in the screenshot directly above, the action is named “New line”. In the action, the “l” in “line” is not capitalized. In the expression, it is capitalized. I don’t understand why this is. You can see something similar in two screenshots above inside the action named “GetDateFromSubject”. The “G” in “GetDatefromSubject” is capitalized, but in the expression, the “g” is lowercase. I would expect this to be precise but it isn’t.

In summary, now that I’ve worked in Power Automate for a while, I rename all of my actions with a short description using camel case (no spaces or special characters). Now that you understand the impact of naming actions, let’s talk about better ways to annotate and collaborate than in the name.
Comments & Notes
For documentation, add notes to each action, which can be found in the “3 dot” menu shown here.
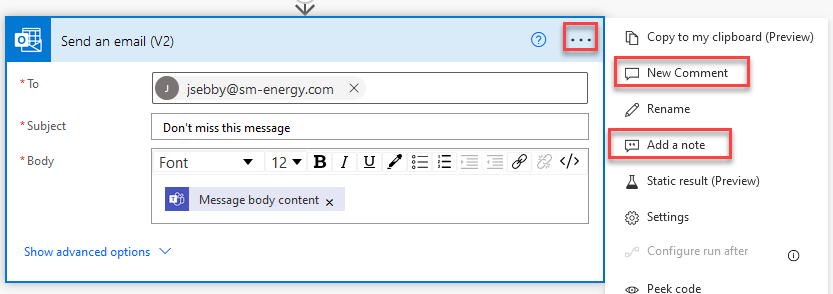
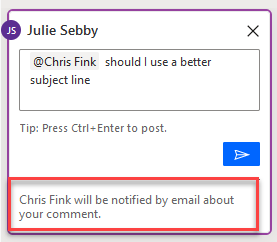
For collaboration, make use of comments. With comments, you can tag other owners, and they will receive an email notification.
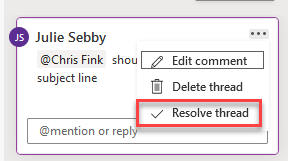
Comments may also be resolved and removed as needed.
Before wrapping up, I want to talk about another trap I fell into when starting with Power Automate.
Here Not There
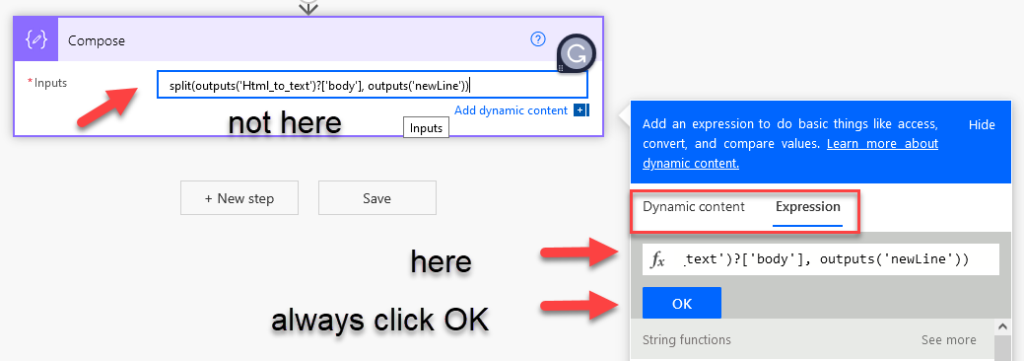
When I first started working in Power Automate, I clicked in all the wrong places and had a generally frustrating experience. I didn’t know that dynamic content can only be found in the Dynamic content tab. You must click Add dynamic content to pull up the dialog. I also attempted to add expressions to action text boxes, but expressions must be entered in the Expression tab as shown below. And, when working with either dynamic content or expressions, you must OK or UPDATE. Clicking outside the dialog will lose your input and/or changes.
I found my mousing actions to be very clunky at the start, and they improved over time as I watched YouTube videos of folks who had been at it longer than me. It may be frustrating at first, but you’ll become more proficient.
Conclusion
Now, you know a little bit more about building and developing in Power Automate. Hopefully, you’ll avoid some of the frustrations I ran into when I first started. The next post will dive into troubleshooting flows that aren’t succeeding.
Pingback: Getting Oriented with Power Automate » The Analytics Corner
Pingback: Exploring Power Automate Triggers & Actions » The Analytics Corner
Pingback: How to Decipher Dynamic Content in Power Automate » The Analytics Corner
Great video. Thanks for sharing!
Thank you! Glad you liked it.