In October 2021, I started a new role on our Robotic Process Automation (RPA) team to help automate manual processes. Our solutions utilize Power Automate, Power Automate Desktop, and Alteryx. As automation matures within the organization, we intend to deploy Power Automate as a self service tool. Therefore, this is the first in a series of posts oriented towards beginner Power Automate users. If you are just getting started with Power Automate, this is the place for you! Read on to get started with Power Automate!
This post aims to help beginner Power Automate users get oriented in Power Automate menus. It covers what you want to pay attention to and what to ignore (for now), as well as which menus can help you explore Power Automate. And because I know some people like to read and others like to watch, this content is available in written and video form.
Login
To begin, go to this link. From the login screen create a Microsoft account OR login with an existing Microsoft account. If you are learning Power Automate for business purposes, use a work email address, as it will be connected to all of your other professional Microsoft subscriptions and products. Because Power Automate is a cloud based application, there is no download or install. Users access the software via a Browser.
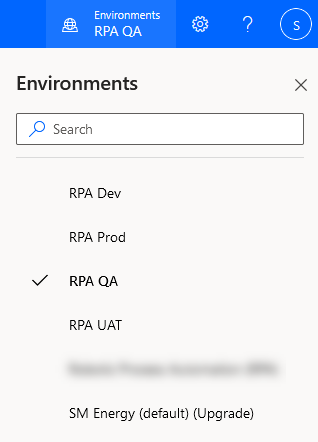
The Environment
Now, after logging in, everyone wants to click in the menus on the left, including myself. It’s a hard habit to break. But, this adds unnecessary clicks. Instead, select the correct environment. Microsoft allows you to create multiple environments, and you need to make sure you’re in the right one. The right one depends upon your organization.

Click on the environment listed under Environments to activate a drop-down list. Then, you can choose the right environment. If you choose the wrong one, you probably just won’t have any permissions.
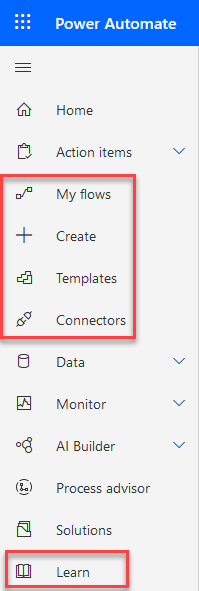
Menus for Beginner Power Automate
Once in the right environment, you can start exploring. So, let me show you what to poke at and what to leave alone, for now. This blog post will cover the menu options circled in red to create flows and explore Power Automate.
Creating Flows
Create Menu
To create a flow, go to the Create menu. Here, Microsoft offers 3 ways to create flows.
- From blank
- From a template
- From a connector
Create from Blank
Now, I’m going to lead with Create from Blank. Although, starting from blank might be a bit intimidating. If it is, skip down to Create from Template or Create from Connector.
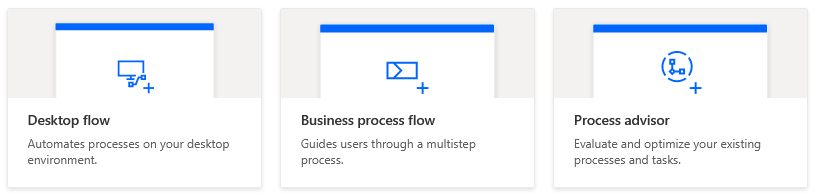
When starting from blank, Power Automate offers 6 options.
- Automated cloud flow
- Instant cloud flow
- Scheduled cloud flow
- Desktop flow
- Business process flow
- Process advisor
I’ll make this simple. Start with either Automated cloud flow or Instant cloud flow. If you don’t know what trigger you want or don’t know what a trigger is, start with Instant cloud flow. You can add a trigger later. If you know what trigger you want, start with Automated cloud flow, even if you want to schedule it. You’ll add a schedule later after building out the flow. That will be the last step. The next post will discuss triggers and actions.
Options 1 and 2 are good starting points for new Power Automate users. This blog series will focus on options 1-3. Option 4, Desktop flow, will actually launch Power Automate Desktop if you have the application installed. But, PAD is a different application and isn’t covered in this series. Business process flows help ensure that people follow the same steps every time they execute a process and provide a guide for people to get work done. This is useful, but let’s learn how to use Power Automate first before going into business process flows. Lastly, the process advisor, which is also its own menu, uses recordings of processes to advise on automation and process improvement. Because this is a beginner Power Automate series, we are going to learn to walk before we run, so the process advisor is not part of the series.
So, that covers the different options in Create from blank. Let’s look at the different options in Create from template.
Create from a Template
Starting from a template can be an easy way to get to know Power Automate. The solution comes prebuilt (i.e. a template), and it provides a detailed path for how to achieve a specific task and build out automations.
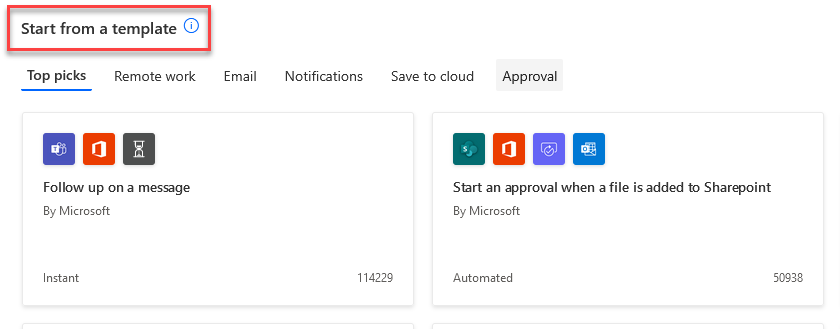
You can browse lots of existing templates from either the Create menu or the Templates menu. Both of these areas of Power Automate will have a Search all templates text box to help you find inspiration.
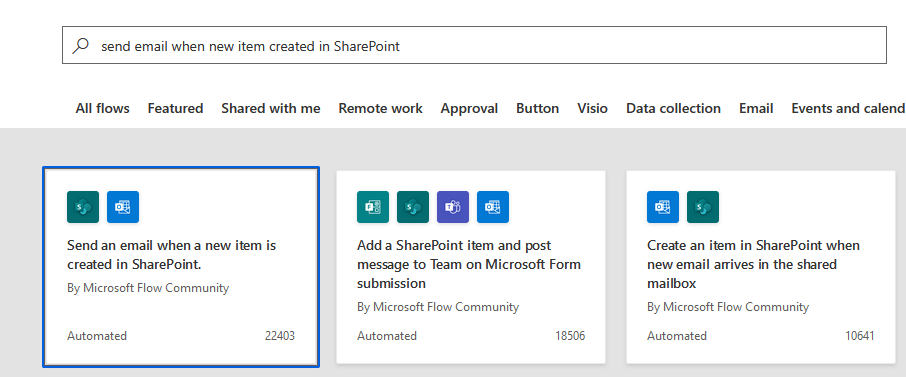
Let’s say you want to send an email when someone creates a new item in SharePoint. Type that into the search and see what pops up. Or, just type the name of an application you want to interact with, like Outlook.
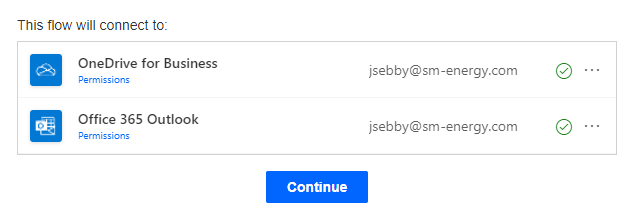
After clicking on the template, Power Automate will show the connectors used in the template. If an existing connection does not exist, it will ask you to sign in to create one. You won’t be able to continue without signing in.

Now, I specifically chose this example because one of the things I struggled with was how Microsoft labels their applications. It turns out Microsoft has a ton of products, and what you are looking for might not go by the name you searched for. In the screenshot above, I have an existing connection setup with SharePoint, and Power Automate wants me to sign in to use Outlook.com. But, I know that if I sign in, it will say my account doesn’t exist. That is because my email is accessed thru Office 365, not Outlook.com.
If I type Office 365 into the template search and just click on the first template to get back to the same screen, you can see that I do have an Office 365 account. The same is true for Excel. You won’t search for Excel actions. Search for Excel Online or Excel for Business.
Once you have signed in to all applications, the Continue button will turn blue and be clickable. Next, let’s look at creating from a connector.
Connections
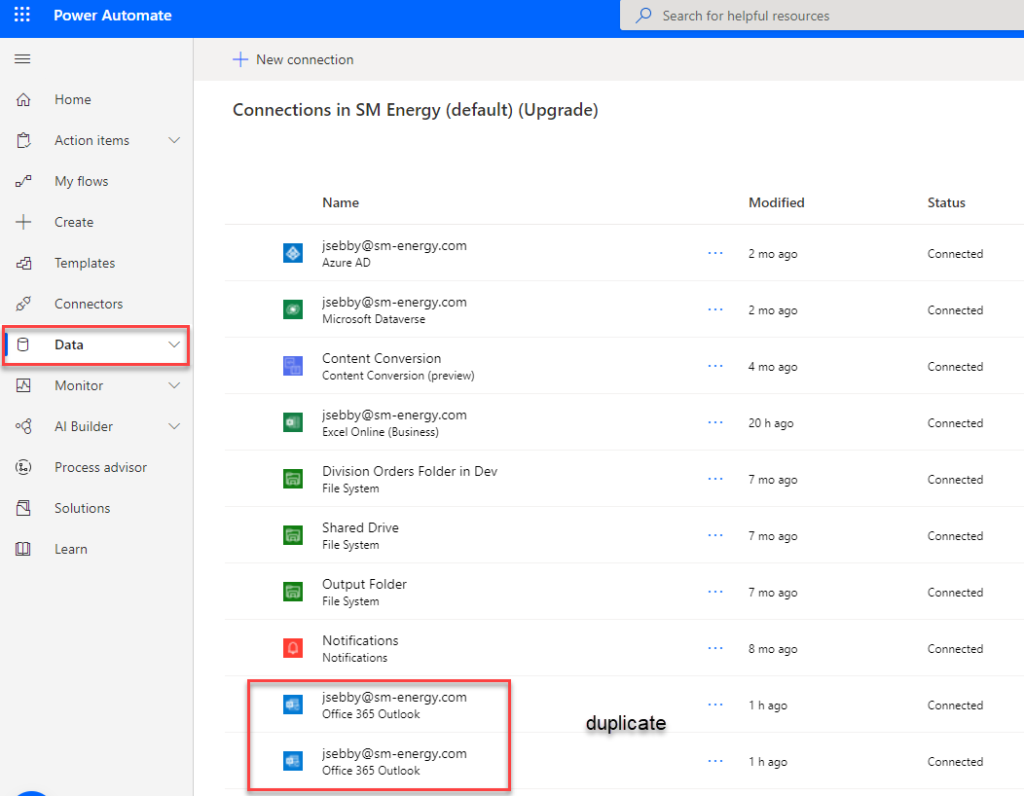
Now, when you sign in, you create a connection that will be visible in the Data > Connections menu. Connections are how Microsoft accesses data for specific users’ accounts in applications like Teams, SharePoint, and Outlook. Connections differ from connectors. Every application you touch in Power Automate requires a connector and a connection. You’ll also notice connections can be duplicated, and this is something we want to talk about but that will happen in a later post.
Let’s take a look at the last way to create — Create from a Connector.
Create from a Connector
You can also learn and explore using Create from a Connector. A connector is the infrastructure used by a connection to utilize a specific application like SharePoint, Teams, or Outlook.
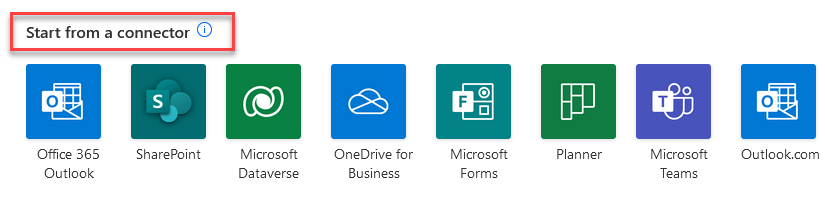
This screen provides a good way to learn because it will take you to the Connectors menu. From there, you can explore triggers and templates available for a given connector as shown below for SharePoint.

We are almost done. Let’s review the My Flows menu.
My Flows Menu
When you have created a flow or someone has shared a flow with you, the content will appear on the My flows screen. Until that time, it will be blank. Flows you create live under Cloud flows. Flows shared with you live under Shared with me.
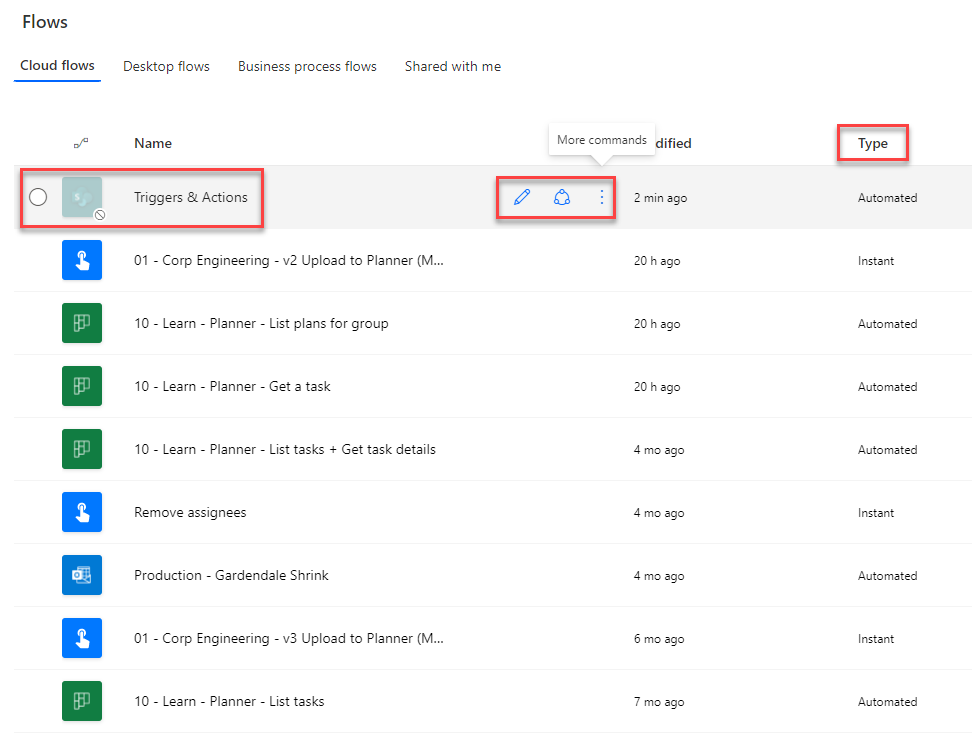
From this screen, you can see the type of trigger used in the flow by the Type shown. If a flow is turned off, it will appear grayed out.
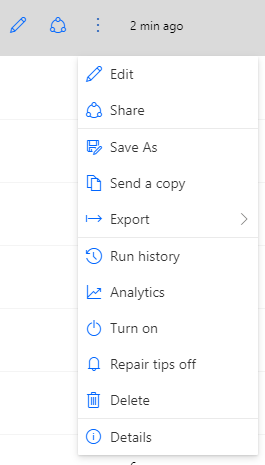
Clicking on the three vertical dots will bring up a menu that provides several useful options including Edit, Share (share the workflow with a coworker), Save As, Turn on/Turn off, and Delete.
From this screen, clicking on a flow will take you to the flow details. But, before we go there, I just want to note that most users go to My flows to find a flow and work on it. But, what they do is click on the flow in My flows, which brings them here, and they click Edit. But, that’s a waste of clicks. You can get to editing faster by simply clicking the pencil shown above while still in the My flows menu.
Flow Detail
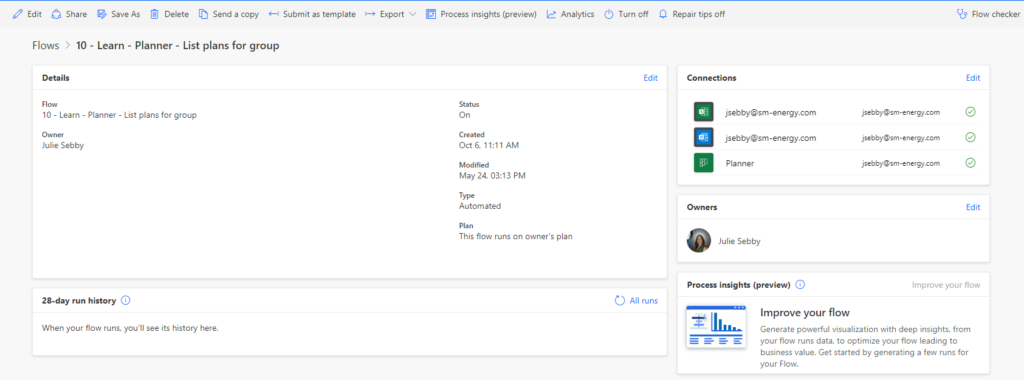
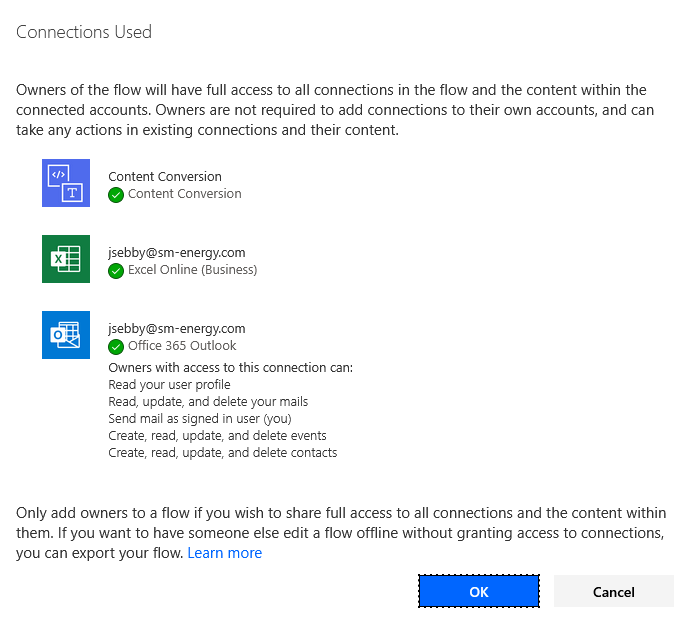
If you click on a flow, Power Automate takes you to a screen with all of the information about the flow including the owner, a description if the owner created one, the connections used by the flow, and the run history.
Sharing Flows
While we are in this space, I want to mention that Microsoft’s long-term vision for Power Automate is for it to be a collaborative tool. Coworkers may share workflows with each other and even work on them at the same time. Workflows can be shared either from the My flows screen by clicking on the three dots. Or, you can click Share at the top of the flow detail screen or Edit in the Owner’s section as shown in the second screenshot below.
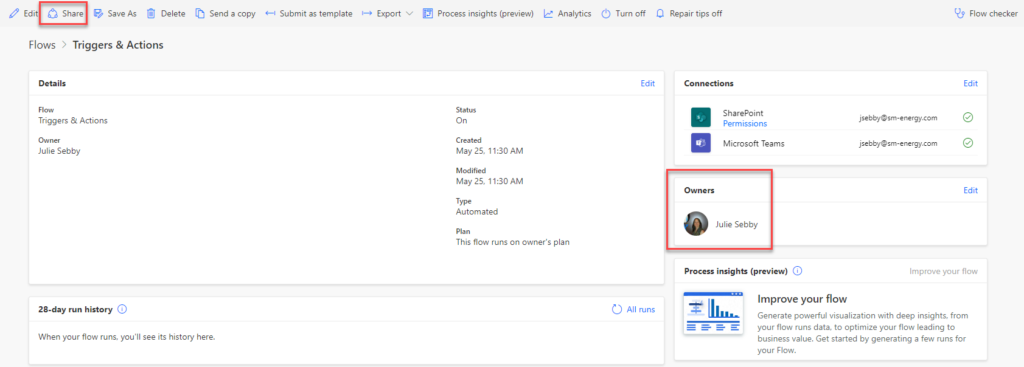
From the next screen, you’ll be able to add additional owners and view required connections.
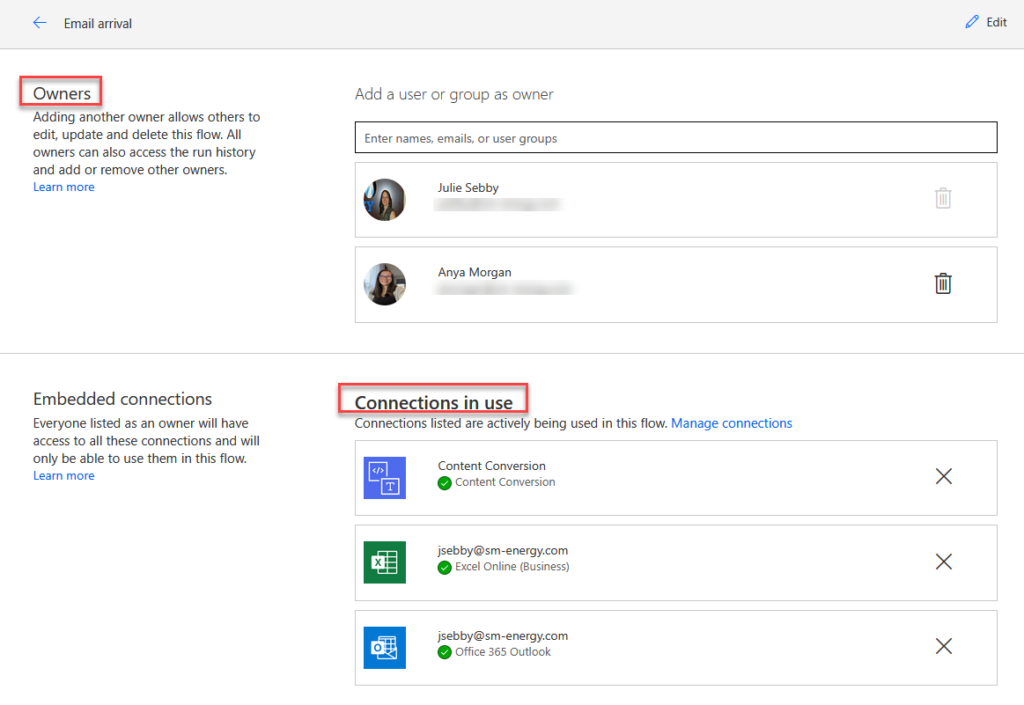
The new owner will need to establish connections if they haven’t already.
And that is how you share flows within Power Automate.
New Flows from My Flows Menu
You can also create a new flow from the My flows screen using the New Flow button which gives you a drop down with all the options mentioned above.

So as you can see, there is a lot of duplication and overlap in Power Automate menus, but that just makes it easier.
Learn Menu
Lastly, the Learn menu serves as a hyperlink that takes you to the Microsoft Documentation site. From here, you can learn more about Power Automate and creating flows. I would also recommend the Microsoft Learn site for further beginner Power Automate learning as well.

Now, go get started building beginner Power Automate flows. The next post in the series will cover triggers and actions.
Pingback: Exploring Power Automate Triggers & Actions » The Analytics Corner
Pingback: Building & Developing in Power Automate » The Analytics Corner
Pingback: Troubleshooting in Power Automate » The Analytics Corner
Pingback: How to Apply Multiple Conditionals in PAD » The Analytics Corner
Pingback: Two Reasons to Keep Tidy Connections in Power Automate » The Analytics Corner
Pingback: What Can You Do With Office 365 Triggers in Power Automate? » The Analytics Corner
Pingback: How to Decipher Dynamic Content in Power Automate » The Analytics Corner
Pingback: Create An Approval Flow in Power Automate » The Analytics Corner
Pingback: How to Update Excel with Power Automate » The Analytics Corner
Pingback: Working with Microsoft Forms in Power Automate » The Analytics Corner
Pingback: SharePoint Site Missing in Power Automate » The Analytics Corner
Pingback: 3 Things to Know About Processing Email in Power Automate » The Analytics Corner
Pingback: How to Understand Code in Power Automate » The Analytics Corner
Pingback: What Can Power Automate Do On Mobile? » The Analytics Corner