
This week’s post explains how to create an approval flow in Power Automate using SharePoint triggers that will notify an approver that something is waiting on their approval, allow the approver to approve or reject, post a message in Teams, and move the document when the process is complete. Read on for step-by-step details.
Use Case
Team members create documents that they upload to Microsoft Teams. Upon upload, the document needs to be reviewed by a manager before moving on to the next step in the process. We will use Power Automate to…
- Recognize when team members upload documents to Teams.
- Notify a manager the document is ready for review.
- Provide an email and a Teams notification the manager can click on to approve or reject the document including a link to the document.
- Post the approval or rejection in Teams.
- Move the document to a new folder.
Action Summary
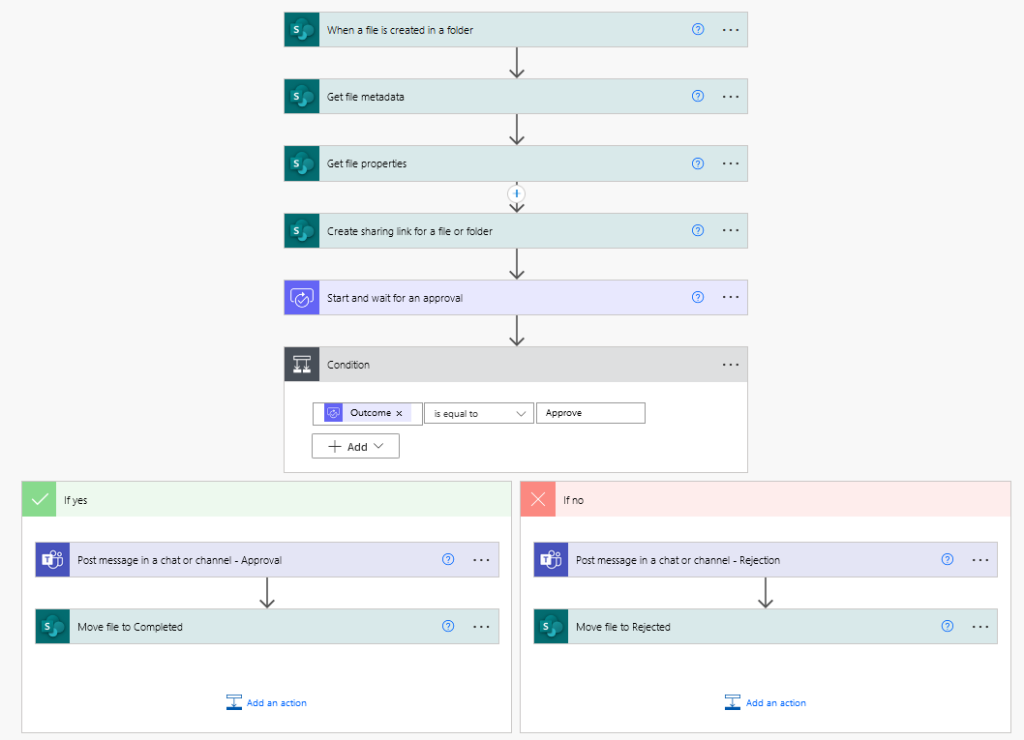
The following actions are used to process each document in the approvals process.
- SharePoint – When a file is created in a folder
- SharePoint – Get file metadata
- SharePoint – Get file properties
- Sharepoint – Create sharing link for a file or folder
- Approvals – Start and wait for an approval
- Condition
- Teams – Post message in chat or channel
- SharePoint – Move file
Detailed Steps
Follow these steps to recreate this approvals flow.
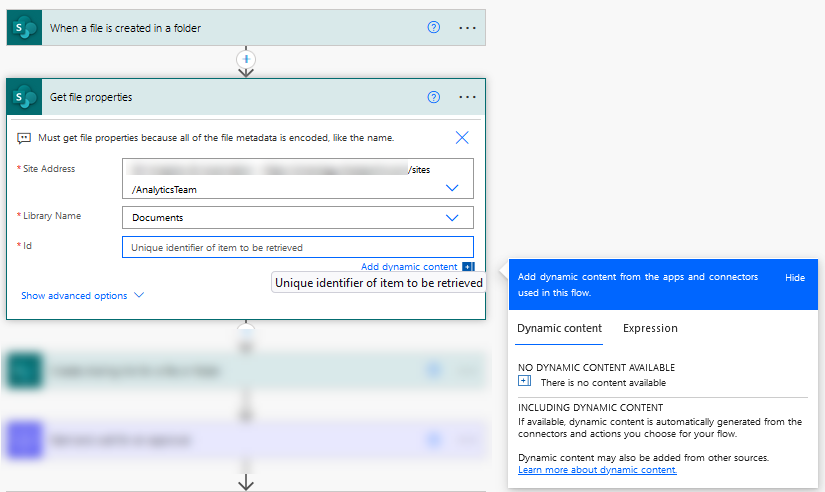
SharePoint – When a file is created in a folder
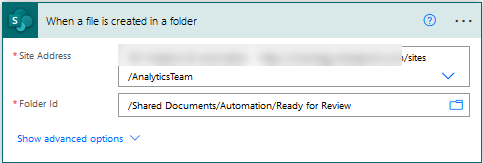
The flow uses a SharePoint trigger that executes anytime users save a document to the specified folder in Microsoft Teams. You might be wondering why we are using a SharePoint trigger for work in Teams. That is because SharePoint is the underlying infrastructure behind file storage in both Teams and SharePoint.
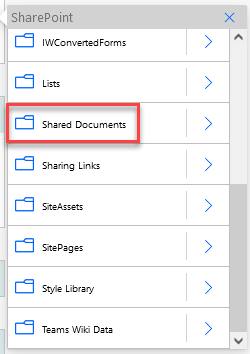
The Site Address drop-down provides a list of all the teams you have access to. Select your team. Then, click on the folder icon in the Folder Id field to navigate to the desired folder.
Remember, you must click on the arrow to drill down into the structure and not the folder itself. We are all used to clicking on folders to drill into them because that’s how it works on our computer, but that’s not how it works in Power Automate. In Power Automate, click on the arrow to drill down. Click on the folder to select it.
Also, when working with file structure in Teams, usually start in the Shared Documents folder. From there, each channel will have a subfolder, and then drill down to find exactly what you are looking for.
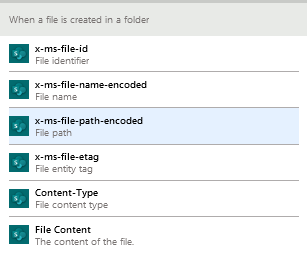
This flow uses a SharePoint trigger and 2 subsequent SharePoint actions to string together the information needed. For more details on how to understand what dynamic content an action provides, check out this post. As you can see, the trigger doesn’t provide much information. The file name is encoded. This means it’s a string of letters and/or numbers that won’t have meaning when read. So, we need another SharePoint action.
SharePoint – Get file metadata
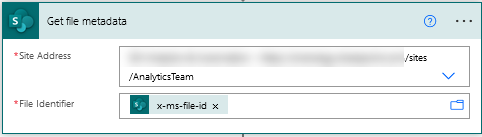
Every SharePoint action requires you to specify the site address. You’ll be doing that in several actions in the flow. For the file identifier, click the dynamic content menu and choose the file identifier x-ms-file-id.
The Get file metadata action comes with 11 pieces of dynamic content. It gives us a clear file name, which we will need. However, it doesn’t provide information on who uploaded the file, which is information you might want to provide to the manager. Therefore, we add another SharePoint step.
SharePoint – Get file properties
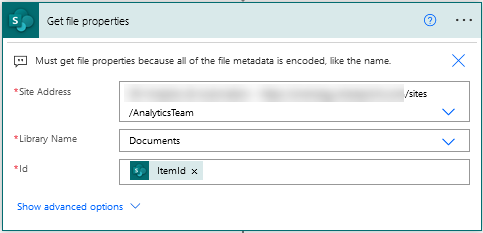
To configure the action, select the same Site Address. Then, click on the drop-down for the Library name and choose documents. For the id, find the ItemId in dynamic content generated by the get file metadata action.
If you inspect the Get file properties dynamic content, you’ll see that it contains a LOT of information. In fact, it’s all the information we might possibly need. So, why did we include Get file metadata? Well, if you take Get file metadata out of the flow, you’ll get no dynamic content after the trigger. I don’t know the technical reason for this. But basically, you must connect different actions together to create a path to the dynamic content needed for the flow.
SharePoint – Create sharing link for file or folder

Next, we need to create a link to the file being reviewed. This makes it easy for the manager to access the file and know what they are approving. For the Item ID, we want to use the ItemId from the Get file metadata action. Under the link type, choose View only, unless you want the manager to be able to edit the file. In Link Scope, the most likely choice is People in Your Organization. If you choose Anyone with the link, and your company has not enabled external sharing, you’ll get an error. See the Errors section below for more details. Now, we are ready to build the approval.
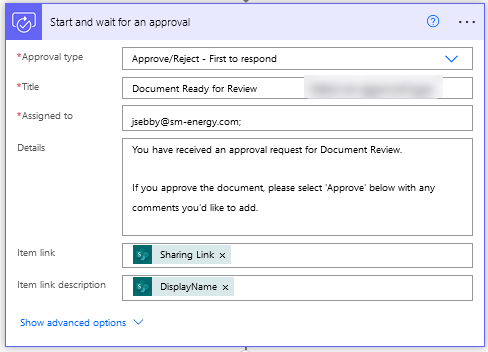
Approvals – Start and wait for an approval
When searching for the approvals actions, notice you have multiple options. Power Automate provides an option to Start and wait for an approval, as well as Create an approval and Wait for an approval as separate actions. This flow uses Start and wait for an approval. However, there is more than one way to design an approval flow, and if I were designing a flow where I also wanted to send reminders to the manager, I would select Create an approval and later add Wait for an approval. Just know that these actions are different, and they produce different dynamic content.
To configure this step, choose Approve/Reject – First to respond for the Approval type. You could choose differently depending on your process. My Title will be Document Ready for Review. The Assigned to field refers to the person doing the approving. The Details section represents the body of the message the approver will receive. You can add as little or as much as you want to the details. The file name and link are provided thru the Item link and Item link description where dynamic content is used from the Get file properties and Create sharing link actions.
Condition
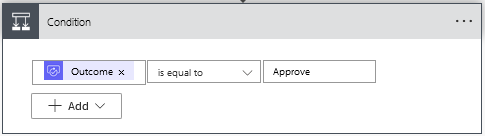
Next, we need to add a condition. Conditions are Power Automate’s way of applying conditional logic, similar to Excel IF statements. If the outcome of the approval is “Approve”, take one set of actions. If the outcome of the approval is not “Approve”, take a different set of actions. You can find Conditions under the action type Control because a condition is a type of flow control action. Set up the condition as shown using dynamic content from the approval action.
Teams – Post message in chat or channel
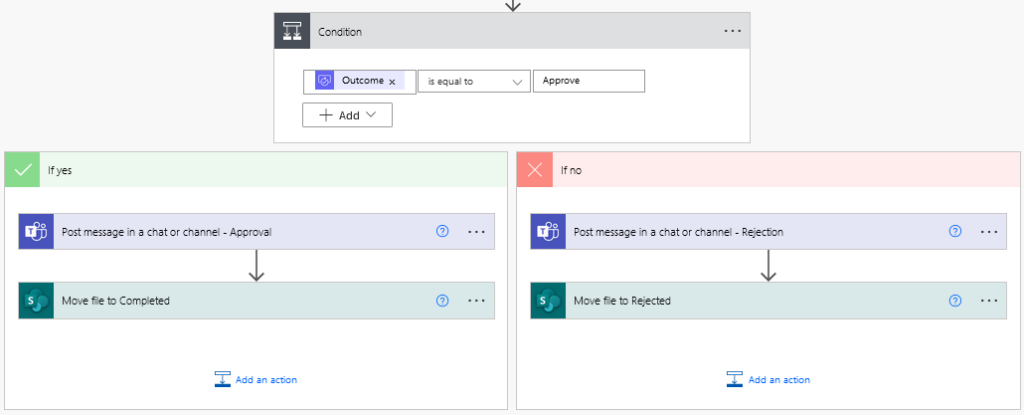
At this point, the flow splits into a Yes path and a No path. You’ll need to configure both paths with the same 2 steps. The Yes path means the document was approved, and so the message should indicate an approval. The No path needs to indicate a rejection.
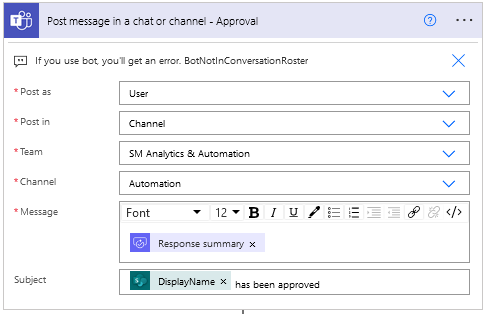
In my first approval flow, I tried posting as a bot, mostly because I had never done it before and I wanted to see what it would look like. I got an error message, which is detailed below in the errors section. Bots must be setup in Power Automate. They aren’t automatically created. Without that setup, you must choose User. Then, select Channel in Post in. As soon as the selection is made, options to choose the Team and Channel will appear. I like to use the Response Summary for the message because it will include comments from the manager. The Subject is optional.
SharePoint – Move file
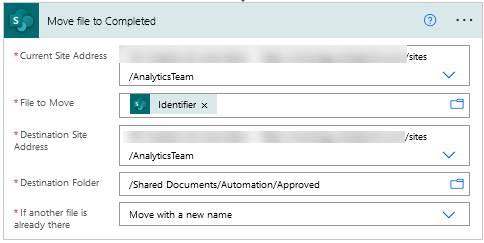
After the message, we need to add another SharePoint action called Move file. Select the SharePoint site. Use the Identifier from Get file properties. The destination site is the same in this case. Select the new destination folder. Options are provided for what to do if another file is in there with the same name. In this case, I move the file and give it a new name.

Troubleshooting
I ran into 2 different errors when building out this flow. These are the errors and either a resolution or links to more information.
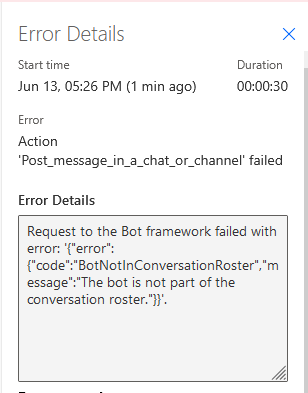
Error 1 in Post message in chat or channel
Microsoft generates this error when the bot does not have access to the channel or when a bot has not been set up. Resolve this problem by posting as a user rather than a bot when using the Teams “Post message in chat or channel” action.
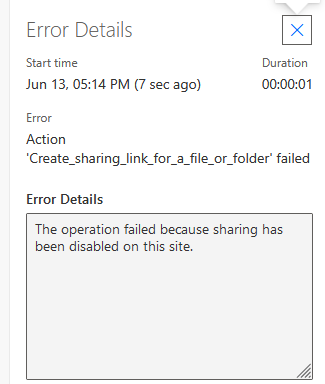
Error 2 in Create sharing link for a file or folder
This error pops up when the Link Scope is set to Anyone with the link, including anonymous and Power Automate settings have been configured NOT to allow external parties to have access to links. Resolve by choosing People in your organization instead. I would expect most companies to turn off link sharing, as it allows anyone with the link to access company drives and data. With information security being such a big deal these days, turning it on would be a huge risk to company data.
That brings this post to a close. Now you know how to create an approval flow in Power Automate. Check out the other posts in this series.
Other Sweet Power Automate Content
- Getting Oriented with Power Automate
- Exploring Power Automate Triggers & Actions
- Building & Developing in Power Automate
- Troubleshooting in Power Automate
- Combatting File System Frustration in Power Automate
- What Can You Do With Office 365 Triggers in Power Automate?
- Two Reasons to Keep Tidy Connections in Power Automate
- How to Decipher Dynamic Content in Power Automate
Pingback: SharePoint Site Missing in Power Automate » The Analytics Corner
Pingback: What Can Power Automate Do On Mobile? » The Analytics Corner