
This week, I built my first app and will be publishing several posts on what I learned. This post will explain how to build Alteryx apps with pre-populated drop-downs. Future posts will explain how to debug apps, as well as open and close containers with radio buttons. Read on to learn how to set this up in your own workflows and apps.
Blog or Video
My App
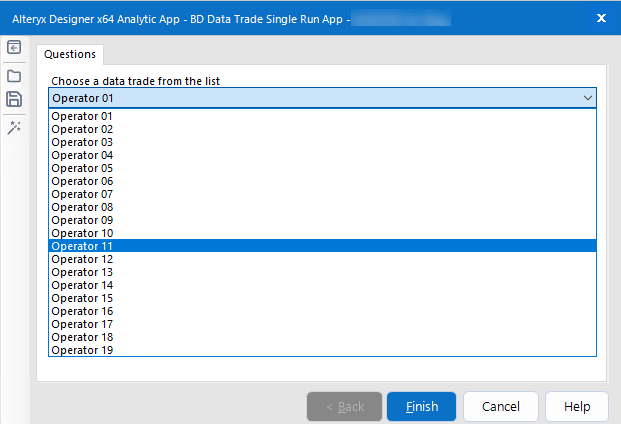
The purpose of my app is to allow a user to choose an operator and then query data for that operator. They only need to choose one operator at a time.
App Components
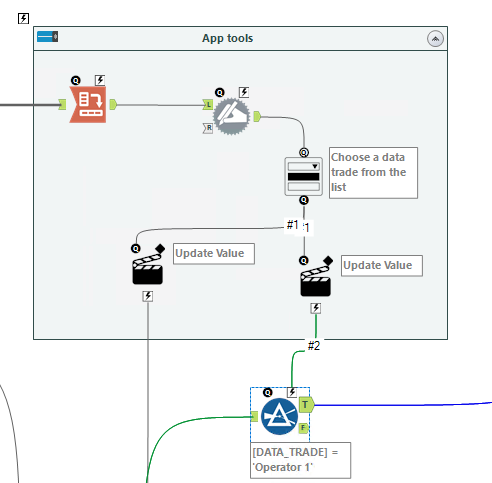
To create the app, I need the following tools: Cross Tab, Dynamic Rename, Drop Down Interface, Action and a Filter.
Detailed Steps
Creating Apps with Pre-Populated Drop-Downs
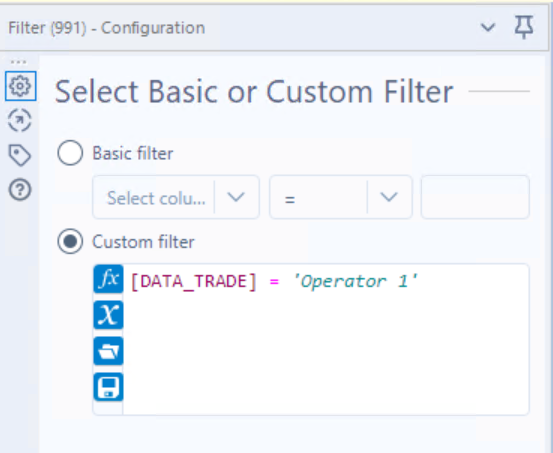
- Add a Filter tool into the workflow the drop-down selection should occur. Configure it to filter down to one value. Really any string value in the filter will work since the value will be replaced.
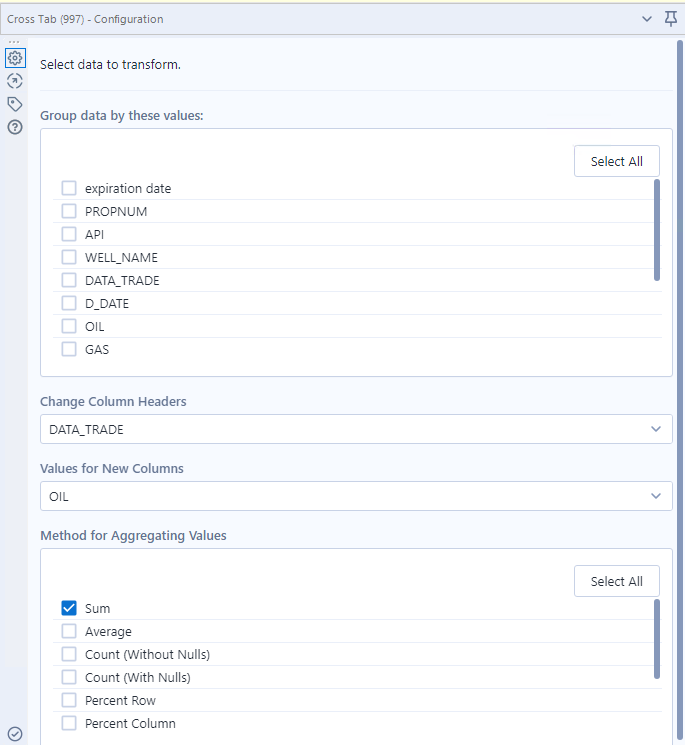
- Connect a Cross Tab tool to the tool before the Filter. The Cross Tab generates unique values to populate the dropdown. To me, this was counter-intuitive. I would have expected to generate a list of unique values in a column and the tell Alteryx to use that column. Instead, they are fed in as column headers after the Cross Tab. What is aggregated and how it is aggregated do not matter. The goal is to create a list of unique values via column headers.
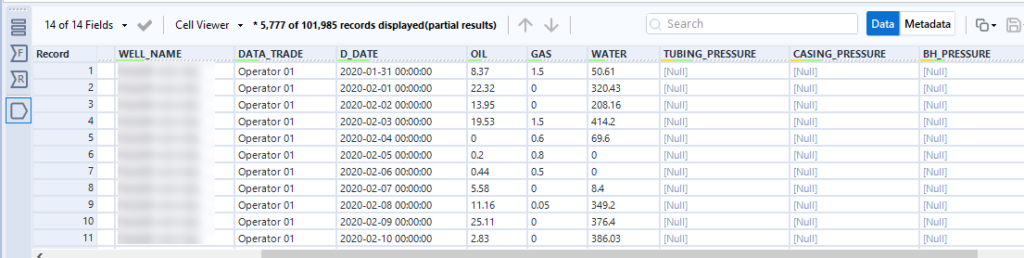
Data before the cross tab…
Cross Tab config…
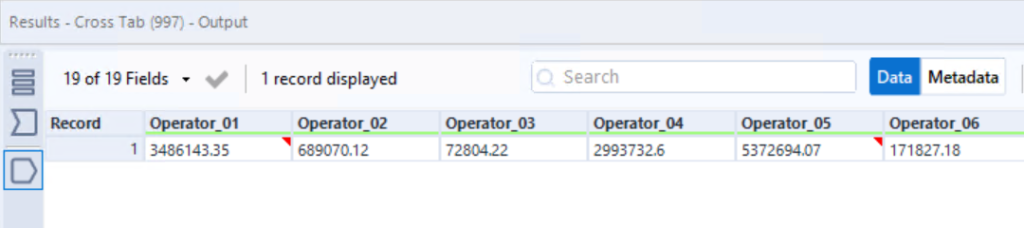
Data after the Cross Tab…
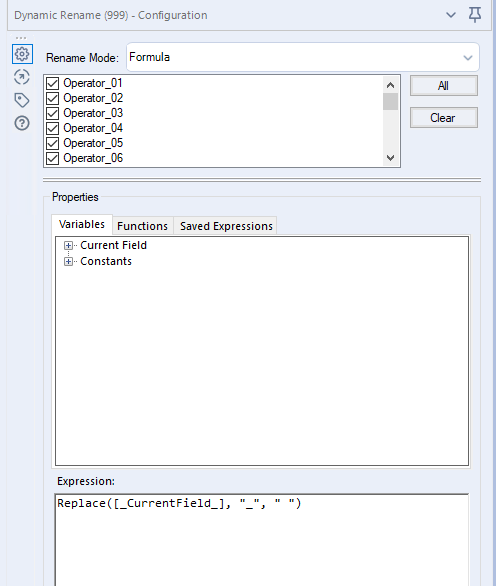
- Because the Cross Tab replaces spaces and special characters with underscores, a Dynamic Rename is used to fix the operator names.
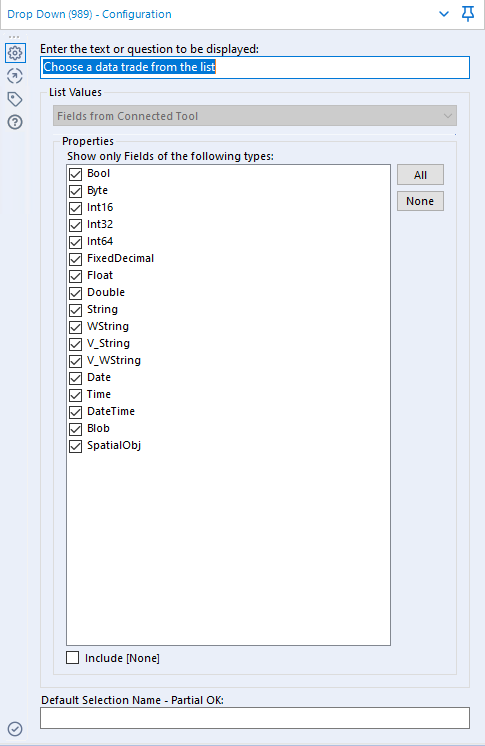
- Next, add a Dropdown Interface tool. Because it is connected to another tool on the input side, the configuration defaults to “Fields from Connected Tool”. The column headers from the Dynamic Rename are fed in as the values for the dropdown menu. You’ll want to leave instructions for your user in the text box. NOTE: Once you add the interface tool, the workflow becomes an analytic app.
- Lastly, the Action tool connects to the Filter tool and is configured to “Replace a Specific String”. And, you must specify the string to be replaced. This replaces the value in my filter with the value selected from the dropdown menu.

Caveats & Info
Configuring the User Interface
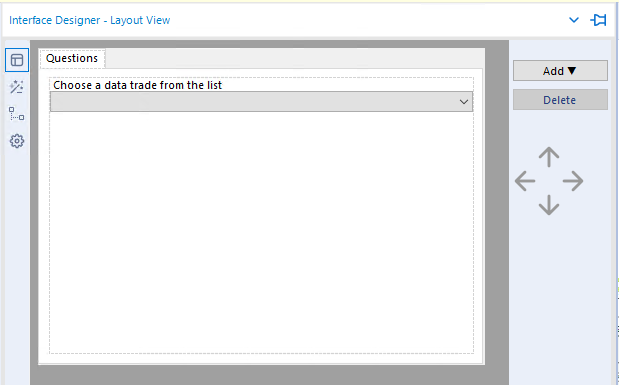
To configure what the user will see, open the Interface Designer from the View menu. It is not open by default. If you had more than one user selection in the app, the Layout View within the Interface Designer would allow you to organize and order the control. In this case, we only have one option, so there isn’t a lot to do here.
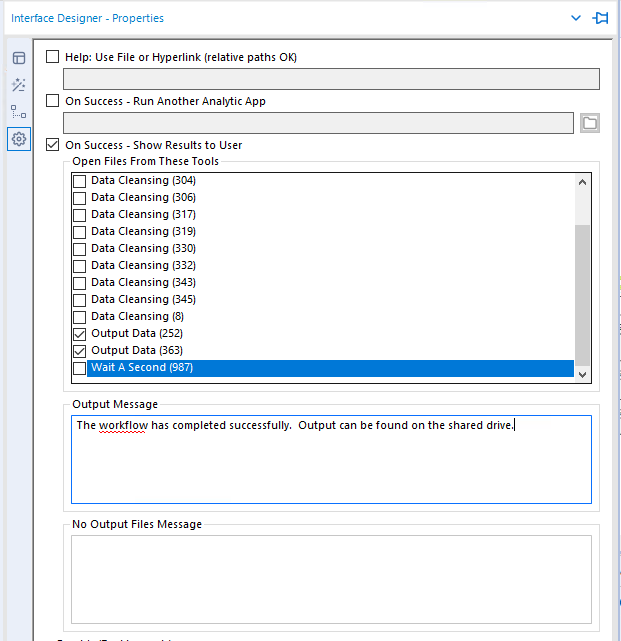
You might want to go to Properties in order to configure what should happen upon successful completion of the app. I have my app setup to show me the output files.
Testing the App
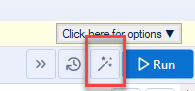
To test what you have built, click on the wizard button shown in the top right-hand corner of the screen next to the Run button. This will run the workflow as an app and you will have the same experience your users will have. It’s also always a good idea to test workflows from the Gallery as well before deploying. But you already know that!
And now you know how to build Alteryx apps with pre-populated drop-downs. Stay tuned for more posts on how to debug apps and how to open and control containers with checkboxes and radio buttons.
Alteryx Version
Content created with Alteryx 2020.3.
Pingback: How to Debug Alteryx Apps » The Analytics Corner
Pingback: How to Rename Tabs in Alteryx Apps » The Analytics Corner
Hello Julie! Quick question about the point you mentioned: “schedule a non-App version of the workflow to run daily in order to make sure the list of unique values is accurate”. Could you please provide more details on this, do i need to save a .yxmd version of the workflow without any interface tools and schedule it?
Many Thanks in advance!
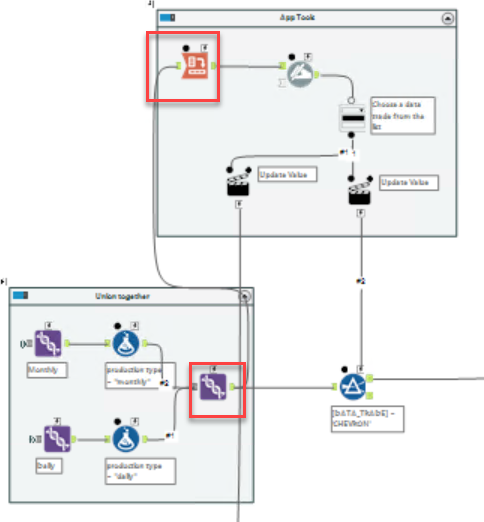
Okay, first, apps don’t/won’t run on a schedule because apps require selections and when you run on a schedule, there is no one there to make a selection. So, I was suggesting that you could have another version of the workflow that DOES run on a schedule to make sure the list of unique values is accurate and up to date with the most recent data. For reasons I don’t understand, the app won’t populate the drop down with updated unique values unless it is run first. That part makes no sense to me. Test it out and you’ll see what I mean. Run the app. Generate and output. Then, change the data so that the unique values in your drop down would be different and try to use the app again.
If you get a different result, please comment and let me know.
that was actually quite helpful in pointing me in the right direction as well: Creating another scheduled flow (possibly several with a slightly later time schedule in case there might be a time variable on which the input data might be available) so that the most recent data is already uploaded and processed with the most recent data so that when you trigger your flow manually the dropdown list is populated with the most recent data ( in my case: dates). Thank you so much!
Yay! I’m glad it was helpful.
Thank you for the effort to share your work
You are most welcome!