
This week’s content shows users how to copy and paste, then filter with IronPython. This is a very common use case in oil and gas. Quite often we have a list of wells that we want to apply an analysis to. Thus, it is helpful to be able to copy and paste into a filter. Spotfire lets you do this, but it requires a few property controls and some code. Let me show you how it works!
Use Case
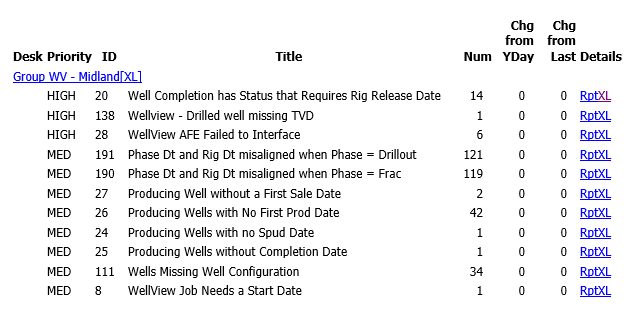
Our techs regularly receive a report showing wells that are missing data. Many of these wells are older we purchased and did not drill or complete. Thus, we rely on public data to fill in the gaps. After receiving this report, it gets forwarded to someone else who clicks on the links to get a list of wells to lookup on a website. It’s a horribly time-consuming process, but people were used to doing it. So, it lived on. Now, analytics has a greater presence. People are questioning low value, manual, and time-consuming tasks and asking for help (yay!!!!!). Here’s what the report looks like.
The data that people are looking up on the website is also available in an on-premise database. I just needed to make it easy for the user to query or filter a specific list of wells so they don’t have to look them up one at a time. This seems like an easy task because you can copy and paste into an input property control. But, that won’t do the filtering for you. You need a little bit of IronPython to make it work. Let me show you how.
High-Level Solution Components
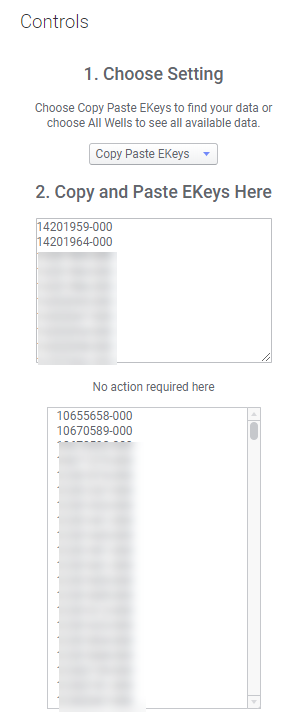
Let’s begin with the end in mind. Here is the text area users will interact with. The drop-down options are “Copy Paste EKeys” and “All Wells”. The user will first select whether they want to see all the data or just data for the copied and pasted EKeys. This is helpful in case no data comes back. Then, they copy and paste a list of EKeys into the input field. The list box is connected to the actual EKey column. The IronPython script selects the values in the list box, which in turn performs filtering via a data limiting expression on visualizations.
It is made up of the following components.
- Dropdown property control
- Input field (multiple lines) property control
- List box (multi select) property control
- IronPython script
- Data limiting expression
Detailed Solution Steps
- First, add a text area to the page.
- Right-click on the text area and select Edit HTML.
- Then, add the drop-down property control with the following steps.
- Click the add property control button. Select Drop-down from the list.
- Click the New button. Name the property control something easy to remember. Set the data type to String. Do not enter a value.
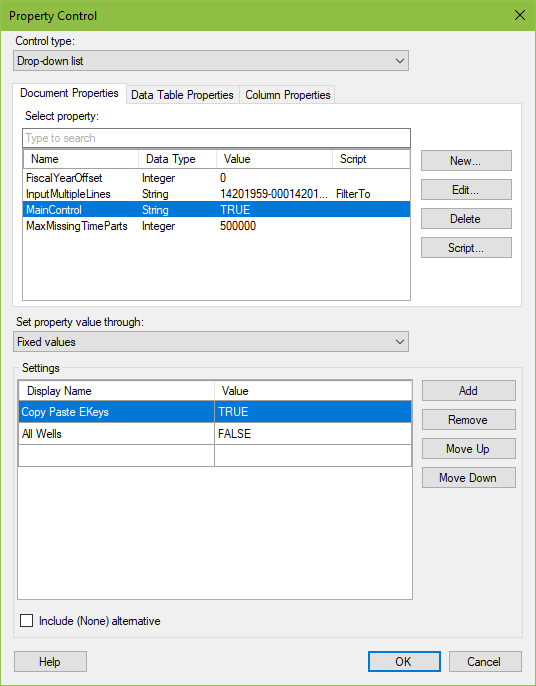
- Select Fixed values from the “Set property value through:” dropdown. Configure the Settings as shown in the screenshot below. The values in the Display Name column may be whatever you want the user to see. The Value must be TRUE and FALSE for the data limiting to work properly.
- Click OK to exit the dialog.
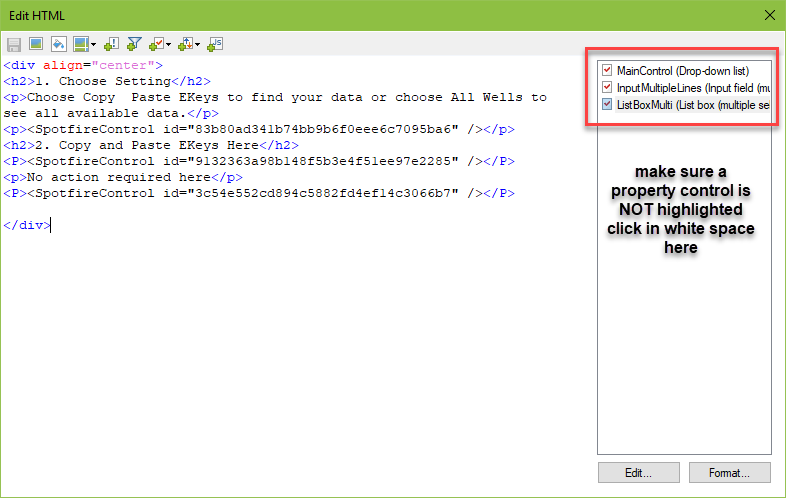
- From within the HTML editor, click in the white space below the list of controls to make sure you do not accidentally edit what was just created.
- Next, add the Input field (multiple lines) property control with the following steps.
- Click the add property control button. Select Input field (multiple lines) from the list.
- Click the New button. Name the property control something easy to remember. Set the data type to String. Do not enter a value. We will come back to this control and attach the script in a few steps.
- Click OK to exit the dialog.
- From within the HTML editor, click in the white space below the list of controls to make sure you do not accidentally edit what was just created.
- Now, add the list box (multiple select) property control with the following steps.
- Click the add property control button. Select list box (multiple select) from the list.
- Click the New button. Name the property control something easy to remember. Set the data type to String. Do not enter a value.
- Select Unique values in column from the “Set property value through:” dropdown. Choose your table and column similar to what is shown below.
- Click OK to exit the dialog.
- From within the HTML editor, click in the white space below the list of controls to make sure you do not accidentally edit what was just created.
- Attach the script to the property control with the following steps.
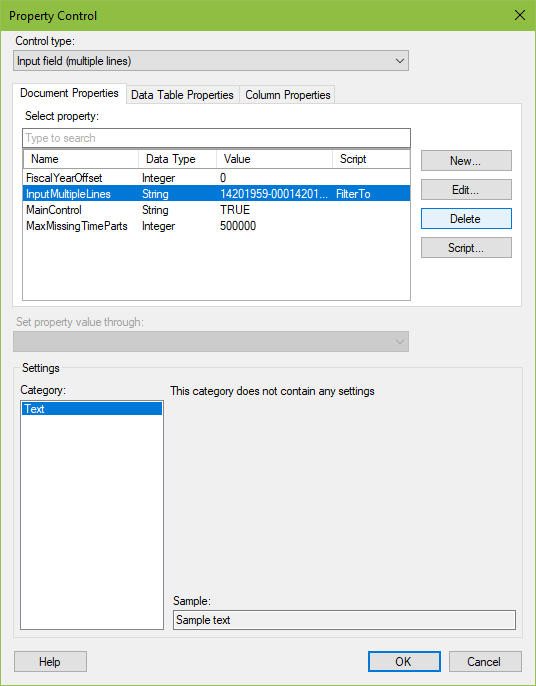
- From within the HTML editor, select the Input field (multiple lines) property control from the list on the right and click Edit.
- Click the Script button.

- Click the New button.
- Name the script “Filter To”. Scroll down to find the script snippet. Copy and paste into the script dialog.
- Replace “InputMultipleLines” with your input field (multiple lines) property control name.
- Replace “ListBoxMulti” with your list box (multiple select) property control name.
- Click Run to test that there are no errors.
- Finally, add data limiting to visualizations using the following steps.
- Go to any visualizations being used with the analysis. Right-click and select Properties.
- Go to the Data menu. Go to Limit data using expression. Enter the expression shown below.
- Replace [WellCompEKey] with your column name.
- Replace ListBoxMulti with the name of your property.

The expression references the dropdown property control and the list box property control. When my user selects Copy Paste EKeys the data limiting will look at the ListBox. Using the $map function, it will create an expression reads as shown below for as many EKeys as the user copies and pastes. If the user selects All Wells then all data will be shown.
[WellCompEKey] = '10655658-000' or [WellCompEKey] = '10670589-000'IronPython Code
import re
string = Document.Properties['InputMultipleLines']
list = [x.strip() for x in string.split('\n')]
Document.Properties['ListBoxMulti'] = list
print('Ok')
Conclusion
Now you know it’s possible to copy and paste, then filter with IronPython.
Spotfire Version
Content created with Spotfire 10.2.