This week’s post touches on a subject I’ve never written about before — data connections. More specifically, I’m going to explain how to build Spotfire data connections with a service account. Building data connections with a service account will allow you to create enterprise data connections that aren’t dependent on a single user’s credentials. Multiple users will be able to use data connections stored in the Spotfire library. If that catches your interest, read on.
I’ve never written about how to build Spotfire data connections before because I have avoided using them for many reasons. First, our IT organization doesn’t want individual users connecting to databases. Adding and subtracting permissions is a lot of administration. Also, users can and do write code so bad that it bogs down the database. Second, my projects are generally created for multiple users. Thus, if I build projects with data connections using my credentials, every time the user opens the project, it will fail to load if they don’t have permissions on the database. Spotfire has an option to store my credentials, but that’s obviously a bad idea. This is why service accounts are a common way to set up Spotfire information links.
How Do Service Accounts Work?
First, IT creates an account with a generic name, like “saSpotfire”. Then, the Spotfire administrator uses that account when creating data sources to feed information links. It’s simple for the Spotfire admin because they don’t have to memorize a ton of user names and passwords. It’s simple for IT if there are ever database or server issues. They can trace the problem to a source (a user or a service account). Fortunately, there is a way to create enterprise data connections with a service account where all of these problems go away.
Before I get into the details, I want to briefly explain how and why I decided to revisit data connections. After all, I’ve used information links for a solid 5 years now.
Spotfire is Evolving
This came about because I was commenting on an Idea for the information designer in the Ideas Portal. TIBCO hasn’t touched the information designer in years, and it needs some help. Thomas Blomberg (of TIBCO) made the comment that Spotfire was moving away from the information designer and towards using connectors. My immediate reaction was……

I reached out to Thomas to talk about this. During our conversation, he explained that it was possible to use one set of saved credentials to set up data connections and then save that connection in the library for general use. Since I had never done this before, some testing was required, but my tests were successful. Now, I want to show you how to do the same thing. I also want to explain why data connections might be preferable to Information Links.
Data Connections vs Information Links
There are three reasons data connections might be preferable to information links.
- Data connections generally load data faster than information links, even if you import the data (as opposed to keeping it in the database). I’ve known this for years. I just haven’t been able to take advantage of it.
- You can connect to more data sources with connectors than with the options available in the information designer. TIBCO is only adding more and more data connectors.
- Based on Thomas’ comment, TIBCO isn’t going to improve the information designer.
So without further adieu, let me explain how to set up enterprise data connections.
Authentication
Now, when first opening a connection to a database (SQL for example), Spotfire asks which authentication method you want to use. There are four options as shown below. Using Active Directory poses the same problems as Windows authentication, so for simplicity, I’ll just discuss Windows authentication and SQL authentication.
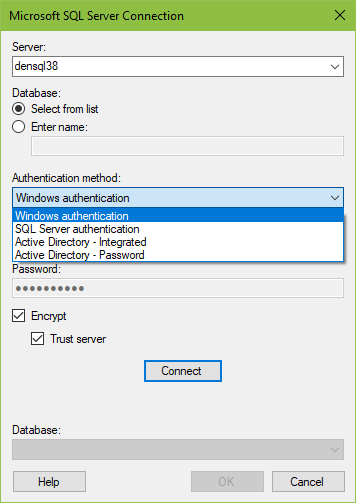
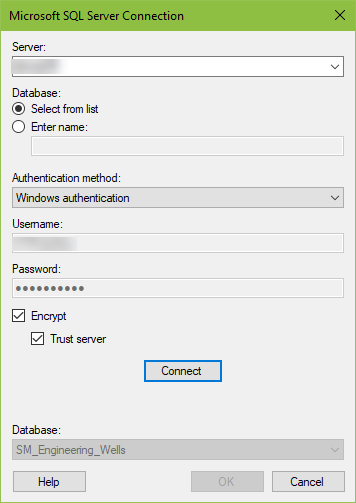
When using Windows authentication, the application will populate the username and password from Windows logon. This is a problem because it means all users of the data source need permissions on the database. If they don’t have permissions, the table will not load.
If SQL authentication is set up, you type in the SQL username and password.
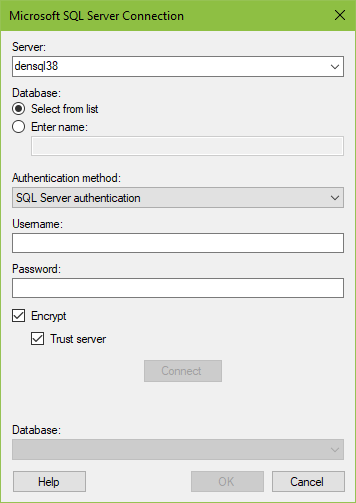
So far, it sounds like SQL authentication is a simple and easy choice. However, depending on how SQL is set up, you might need a SQL account on every SQL server Spotfire accesses. Now, I didn’t know if this was set up for my service account or not, and I certainly did not want to have to ask to set it up on every SQL server. Thus, I decided to go with Windows authentication.
I wasn’t really sure if this would work because there are different ways to setup Windows accounts, and I had no idea exactly how our service account was set up, but here’s what I did.
Steps to Build Spotfire Data Connections
Here are the steps to build an enterprise data connection all of your users can access.
- Log off my machine as me and log on with the service account username and password.
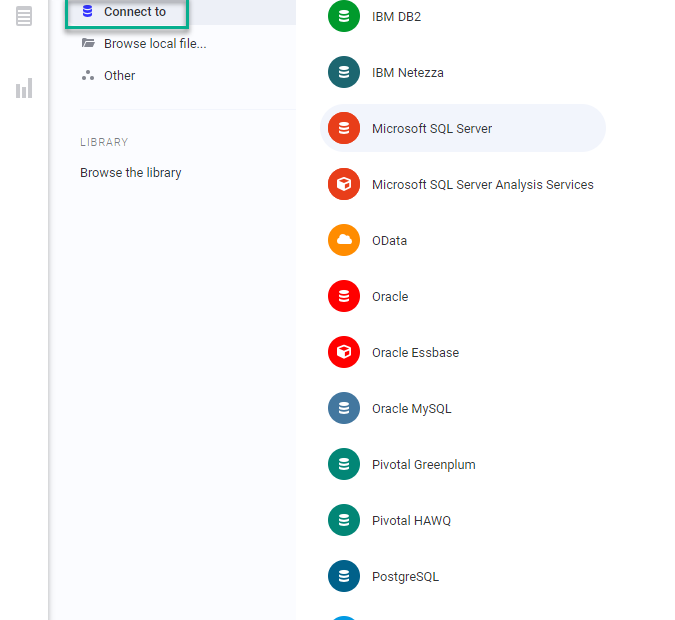
- Open up Spotfire and click on add connection.
- Choose the connector type.
- Choose tables, write s query, and add prompts.
- Make sure to click on the white space to change the import settings to import data.
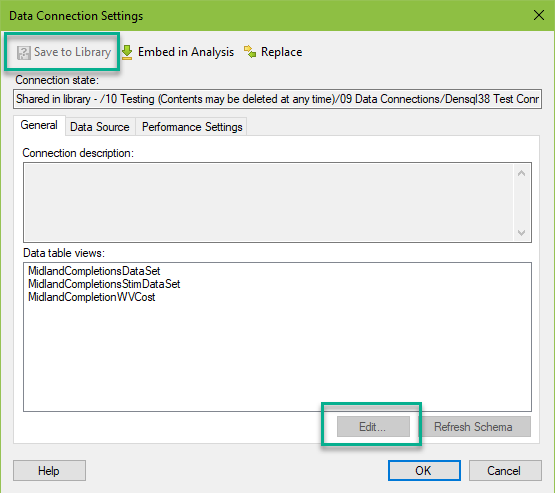
- Go to Data — Data Connection Properties. Click on the connection and click — Settings — Save to Library.
Once saved to the library, any user can use the connection with the Browse the Library option when opening a new file or adding new data. When they add data with it, they won’t be able to change any of the query or credentials. Those options are grayed out when accessing a saved data connection.
Before wrapping up, I do want to mention the configuration options that are common between data connections and information links and those that are not.
Similarities & Differences
Similarities
- Data connections and information links allow customizing SQL.
- Both work with prompts.
- Changing data types is possible with both. Although, changing data types in data connectors is much easier than information links.
- Both can handle parameters for personalized queries.
Differences
- Only Information links allow you to pivot the data before importing.
- Information links allow caching on the SQL server for a set period of time. This is not an option with data connections.
- Users may define relations and keys with data connections.
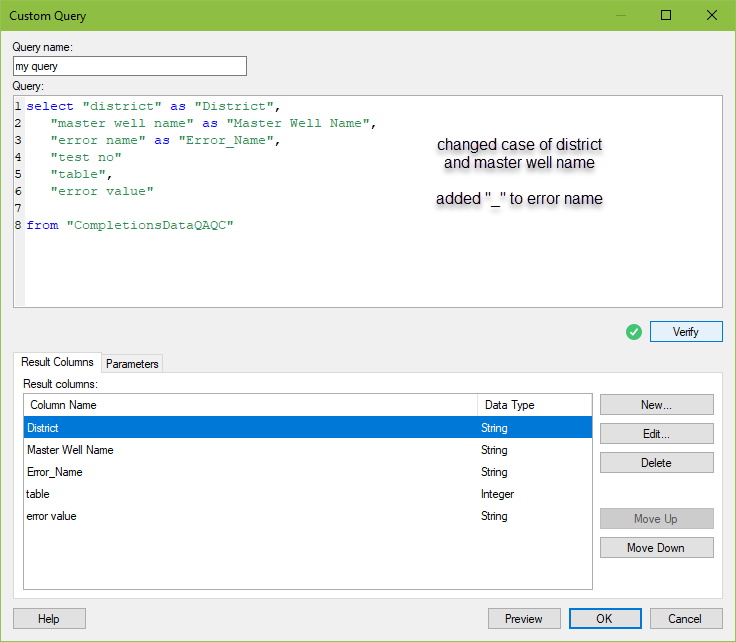
- Users may change the case of column name but not completely rename the column with data connections. This was disappointing, as this is one of the biggest pain points of the information designer. See my two examples below.

Working in the Web Player
Now, this is all great, but I know some of you are asking — What about the web player? This solution will also work with the web player with a few notations.
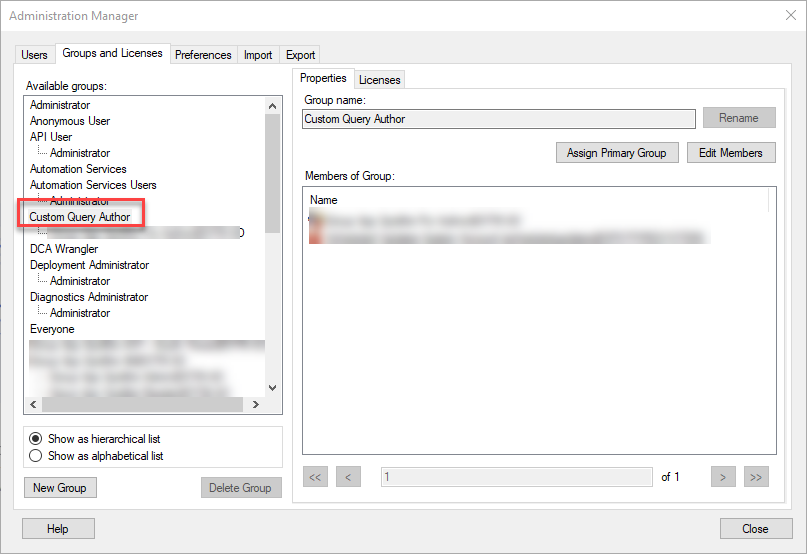
- Any user or service account writing custom queries must be part of the Custom Query Author group (first screenshot below).
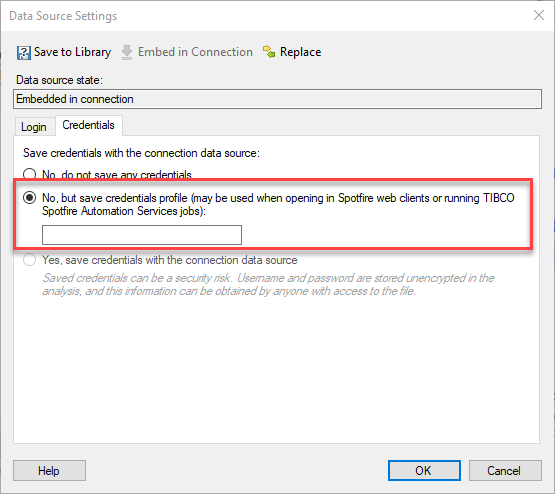
- An admin must set up a credential profile in the web player config file that matches the credentials used. Here is a link to the TIBCO documentation to make this happen.
- When the credential profile is set up, it will have a friendly name like “myprofile” (that’s what’s in the TIBCO documentation). You must modify the Credentials settings in the data connection to use this name (second screenshot below).
Conclusion
You should be ready to build Spotfire data connections now using a service account. I expect I will be using this more as data connectors become a bigger part of our architecture. I hope you found this helpful.
Spotfire Version
Content created with Spotfire 10.2.
If You Enjoyed This…
Check out some of my other admin posts.
Julie, thanks for another insigtful post. Keep them coming.
Since Spotfire 10.2 a couple new data connectors were added and enhanced.
I’m still using traditional Data Sources and Information links. However I also see a shift towards connection Data Sources (cDS) and Data connections (Dc)
Recently I distilleed the possible combinations between linked and embedded in connections and in dxp’s for a project.
Now I use the following analogy:
connection Data Source (cDS) = traditional Data Source – this object has all the connection information. Can be either linked to or embedded in a Data connection (Dc)
Data connection = traditional informationlink – the query object. Can be linked to or embedded in a dxp.
Thanks for the analogy!
Pingback: How To Make Type Curve Inputs More Efficient » The Analytics Corner