When TIBCO released version 7.13, they added the ability to run Python data functions in Spotfire. This means users can write Python scripts as data functions and take advantage of packages like numpy and pandas. Finally, all those Data Camp courses I’ve been taking will have some practical application!
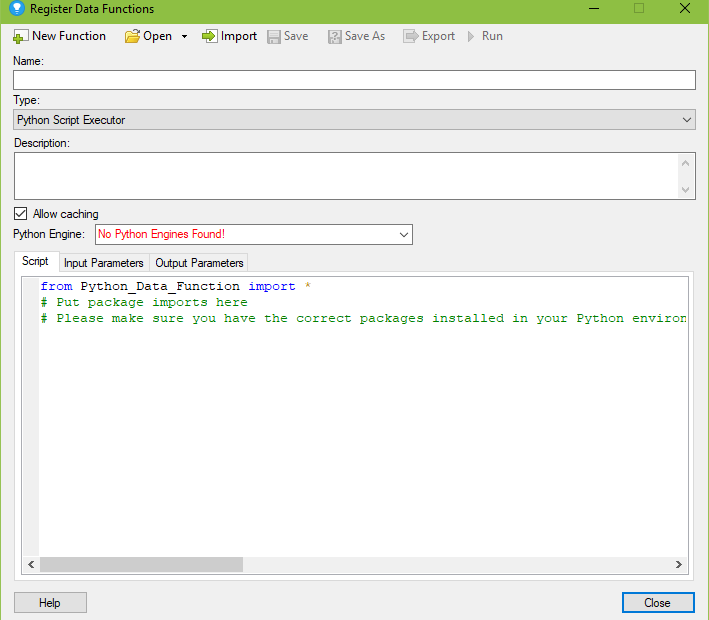
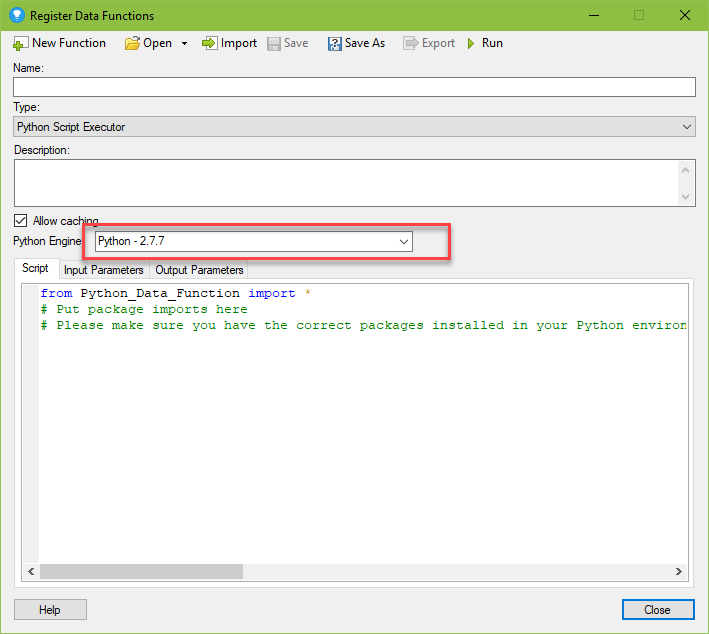
This function came out a while ago, but I’ve only been on Spotfire 10.2 (previously on 7.10) for a few months. I finally have a wee bit of time to see how this really works. To get started, I went to the Register Data Functions dialogs to see what was new and found an obvious problem.
Some Assembly Required
While Python data functions are an out of the box function (no additional purchase required), some assembly is required to enliven them. TIBCO’s documentation can be found on this community post. I will provide a high-level summary of the steps and greater details below.
- Download and install Python 2.7.xx or 3.0.xx on your machine.
- Deploy the Python spks on the Spotfire Server.
- Install environmental variables on your machine.
Installing Python should be an easy task that doesn’t need any further explanation. Deploying the Python spks on the Spotfire Server is an administrative task that must be performed by someone with access to the Spotfire Server. Finally, all users will need to edit the Path environment variable.
The screenshot above was taken after my admin had installed the spks, but I had not yet set up the environmental variables. What’s an environmental variable you ask? An environment variable is a dynamic “object” on a computer, containing an editable value, which may be used by one or more software programs in Windows. Environment variables help programs know what directory to install files in, where to store temporary files, and where to find user profile settings (from www.computerhope.com). Basically, it tells Spotfire where your Python installation lives.
Just to be clear, if you are an admin reading this, all of your users will need to perform steps 1 and 3 in order to use Python data functions. So, let’s talk about how to set up those environmental variables.
Setting Up Environmental Variables
The screenshots below will explain how to set up the environmental variables. Then you are ready to rock and roll in Python.
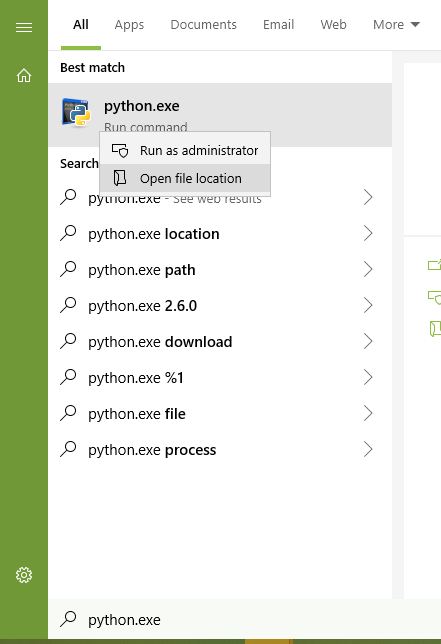
Click the Search button or the Windows button and type in “Python.exe”. Right-click on the result, and select Open file location.
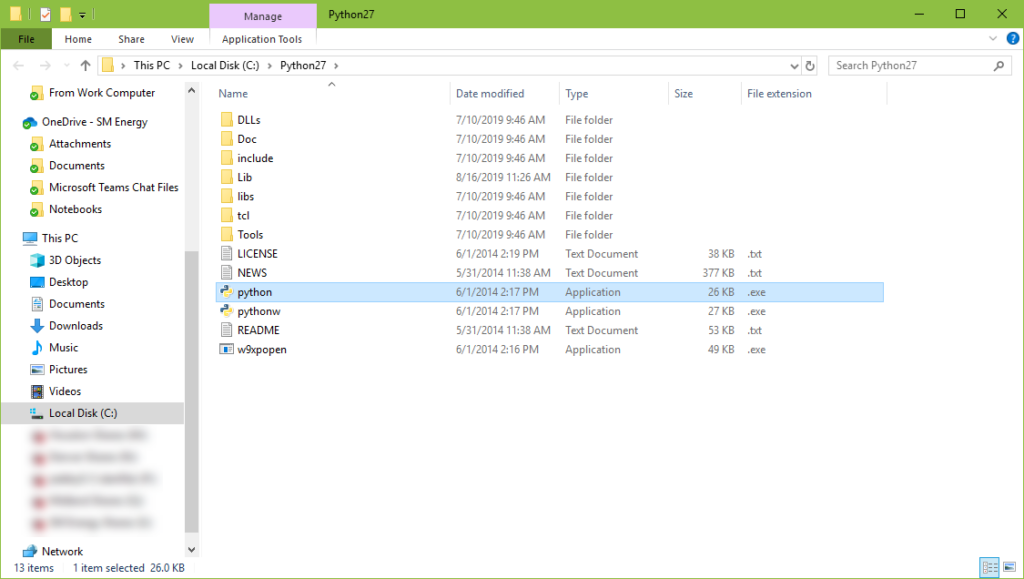
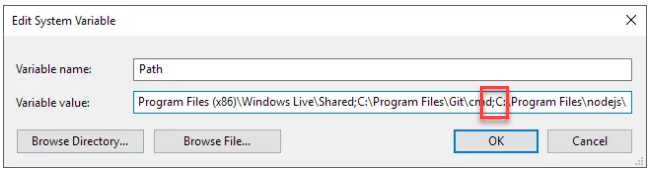
You are in the right place if you see the Python.exe file. Copy the file location from the address bar. In this case, my location is C:\Python27. We will use this file path to update the environmental variable.
Then, you can either …
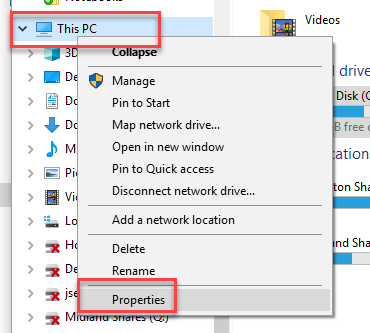
- Open Windows Explorer and find This PC. Right-click and select Properties and then Advanced System Settings.
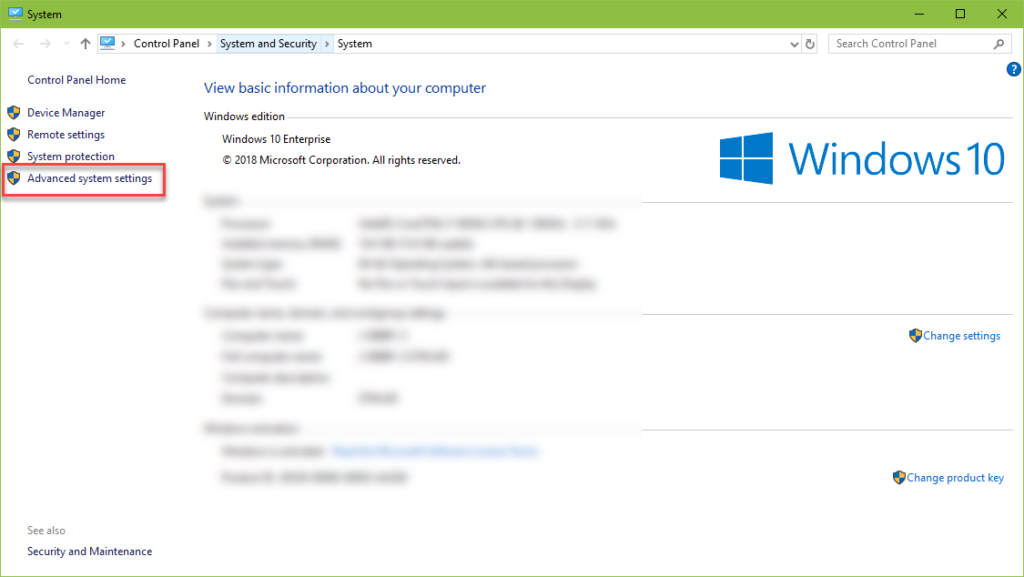
- Click the Windows button, type Control Panel, System and Security, System, and finally Advanced System Settings.
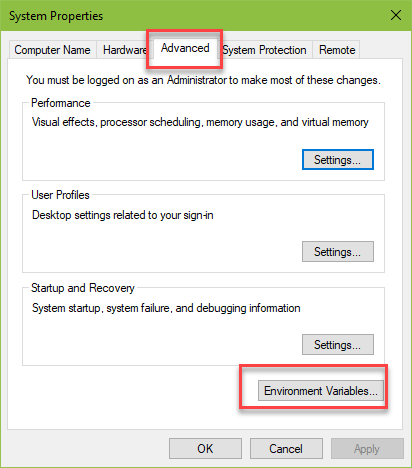
Either route will take you to this dialog, where you should click on the Advanced tab and then the Environment Variables button.
Here, select the Path variable, and click Edit.
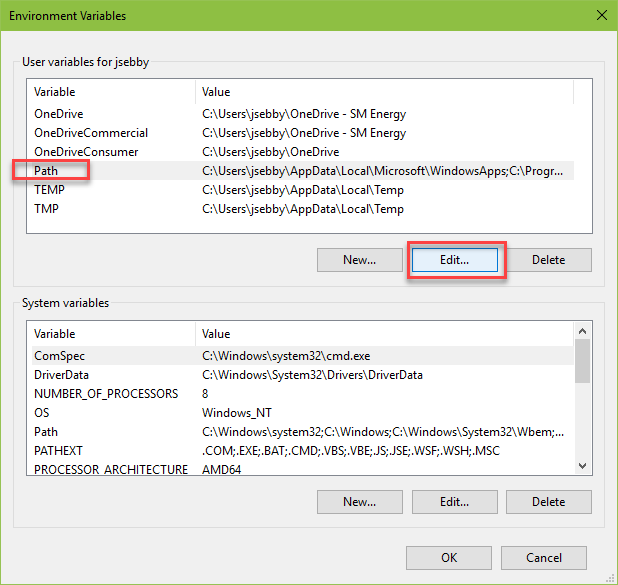
Finally, click the New button, and paste in the file path of your Python installation.
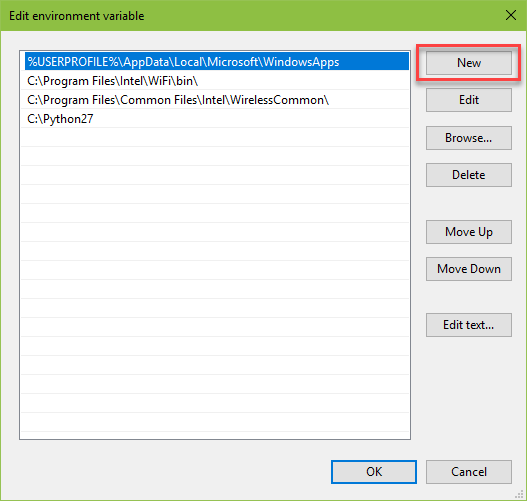
Now, if you have an older interface, there won’t be an option to add a new environment variable. Instead, simply separate them with a semi-colon as shown here.
With this task completed, the Python Engine drop down in the Data Functions dialog will not longer show an error, and you are ready to go.
Conclusion
Now you are ready to get started writing Python data functions in Spotfire. I’m looking forward to trying out these new features and sharing my experiences with you. I’ll be testing out how to work with packages like pandas and numpy very soon.
Spotfire Version
Content created with Spotfire 10.2.
If You Enjoyed This…
Check out my other posts on Spotfire IronPython including Adding a Bar Chart with IronPython and Changing Visualization Titles with IronPython.
Pingback: How to Build Spotfire Data Connections for Multiple Users » The Analytics Corner
Pingback: How to Install Python Packages in Spotfire » The Analytics Corner
Pingback: What is Python_Data_Function? » The Analytics Corner
Pingback: How to Search for DXP Dependencies » The Analytics Corner
Pingback: Pro Tip No 3 Comment Out Multiple Lines of IronPython » The Analytics Corner