This is week three in my series on learning to use all of the Spotfire property controls. I started with drop-downs and list boxes. Today we hit list box (multiple select), which is really where we dig into the inner workings of custom expression syntax for property controls. Read on to learn how to use list box (multiple select) in Spotfire text areas.
Blog or Video
Use Case
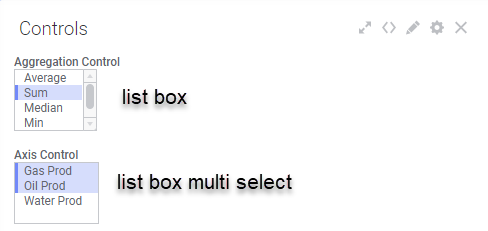
In this example, we will create a list box (multiple select) control that allows the user to put multiple columns of data on the y-axis of a visualization. We will also incorporate the list box control from last week that also allows the user to choose the aggregation method. Our two controls will look like this.
Creating the Property Control
As with all property controls, we begin by creating the property control. I’ve laid out the details below. After that, I’ll explain how to attach the control to a visualization with a custom expression.
First, add a Text Area to your page.
Right-click on the Text Area and select Edit HTML. You can also select Edit Text Area, but once I learned to use HTML and avoid the GUI, I stopped using Edit Text Area.
Click the Insert Property Control button.
Then, select List box (multiple select).
Click the New button.
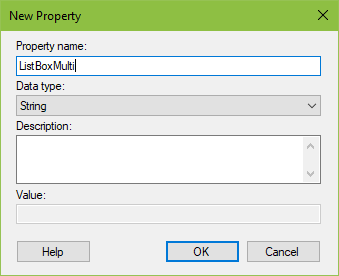
Name the property control and set the data type for the data you are working with. I will name mine ListBoxMulti.
Don’t enter anything in the Value text box.
Then, click Ok.
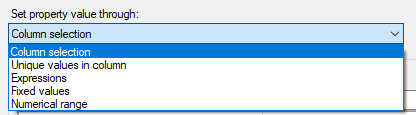
In the “Set property value through:” drop-down, there are several options…(for this example, choose Column selection)…For an explanation of each option, see my post on drop downs.
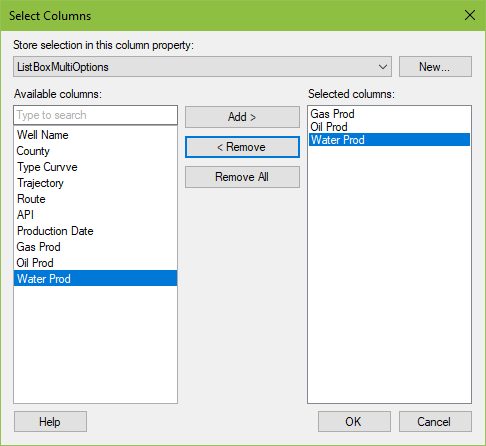
Spotfire defaults to putting all columns from a data table in the drop-down. If you don’t want all columns and want to pick specific columns, click the Select Columns button.
Click the New button.
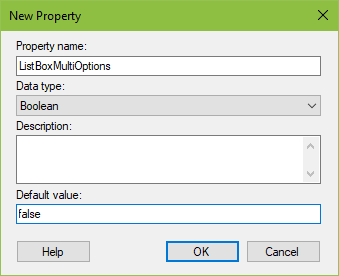
Name the property. It must be a different name from the document property, and it cannot have spaces. I will name mine ListBoxMultiOptions. The data type should be boolean, and the Default value must be either True or False. This link explains the difference between setting it to True or False. I will set mine to False.
NOTE: In this step, you create a column property. In step 6, you created a document property.
Click OK
Move the columns from left to right that you would like to see in the list box.
Click OK until you are out of all dialogs.
Next, we will connect the property control to a visualization using a custom expression.
Connecting the Property Control
Developers may connect property controls to any selector on a visualization (x-axis, y-axis, color by, marker by, trellis by, etc) to give users control and flexibility. Let’s look at how to connect our list box (multiple select) to a visualization. In my drop-down example, I showed an “easy way” and how to write the syntax manually. In this case, we just write the syntax.
Writing the Syntax
In order to write the syntax, right-click on the y-axis of a visualization, and select Custom Expression. Here is the expression we will use. Note, it uses $esc and $map functions. Check out this post if you are unfamiliar with how these functions work.
Note, that you can find the property control in the Available properties for column area, and if you click on the property and click Insert Properties it will prepopulate the following, which gets you part of the way there. Spotfire assumes you want to use a Sum aggregation, and I simply swapped out “Sum” for my other property control with the aggregation options called ListBoxExample.
$map("Sum($esc(${ListBoxMulti}))", ",")
Here is what my final result looks like. And now you know how to use list box (multiple select) in Spotfire text areas.

Pingback: How to Use Input Property Controls in Spotfire Text Areas » The Analytics Corner
Pingback: How to Connect A Spotfire Display Name To A Property Control » The Analytics Corner
Pingback: Using Slider Property Controls in Spotfire Text Areas » The Analytics Corner
Pingback: Using Input (multiple lines) Property Controls in Spotfire Text Areas » The Analytics Corner