Two weeks ago, I kicked off a series on learning to use all of Spotfire property controls. I started with drop-downs and today we are looking at list boxes, which are very similar to drop-downs. They just look a bit different. Read on to learn how to use list boxes in Spotfire text areas.
Blog or Video
Creating the Property Control
In this example, we are going to create a list box control that allows the user to choose an aggregation method for the column of data on the y-axis. Step one is to create the property control. I’ve laid out the details below. After that, I’ll explain how to attach the list box to a visualization.
First, add a Text Area to your page.
Right-click on the Text Area and select Edit HTML. You can also select Edit Text Area, but once I learned to use HTML and avoid the GUI, I stopped using Edit Text Area.
Click the Insert Property Control button.
Then, select List box.
Click the New button.
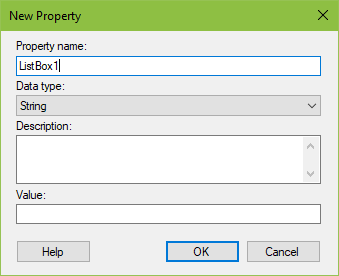
Name the property control and set the data type for the data you are working with. I will name mine ListBox1.
Don’t enter anything in the Value text box. <insert picture>
Then, click Ok.
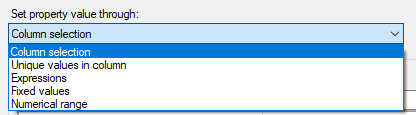
In the “Set property value through:” drop-down, there are several options…(for this example, choose Fixed values)…
Column selection – choose this if you want the list box to populate with a list of column names
Unique values in column – choose this if you want the list box to populate with the unique values from one column
Expressions – choose this if you want the list box to execute based on an expression
Fixed values – choose this if you want the list box to populate based on text or numbers you enter rather than column names or unique values from column names
Numerical range – not relevant for list box lists
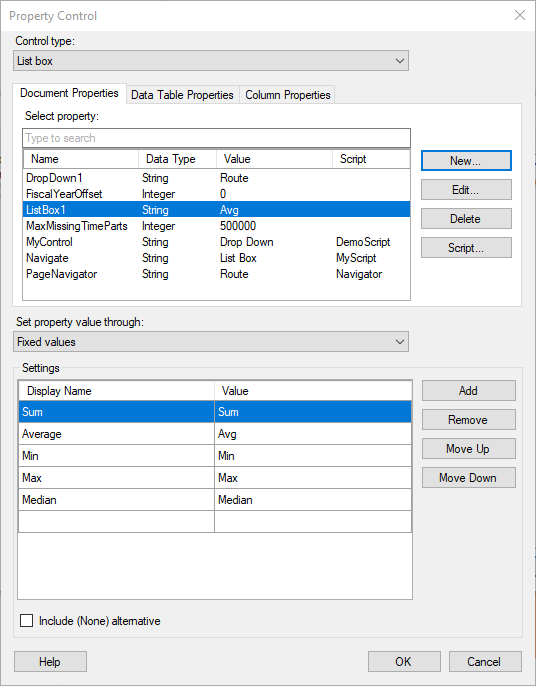
Now, we will enter the aggregation methods we want the user to choose from. The Display Name can be anything. The Value must exactly match the Spotfire aggregation method.;
Click OK
Connecting the Property Control
After creating the property control, you must connect it to something.
Developers may connect property controls to any selector on a visualization (x-axis, y-axis, color by, marker by, trellis by, etc), which gives users much more control and flexibility. You can also connect more than one document property to a particular piece of a visualization, such as a drop-down to let the user choose which column of data is used on a chart and a list box to choose the aggregation method. Let’s look at how to connect our list box to a visualization. In my drop-down example, I showed you an “easy way” and how to write the syntax. In this case, we just write the syntax.
Writing the Syntax
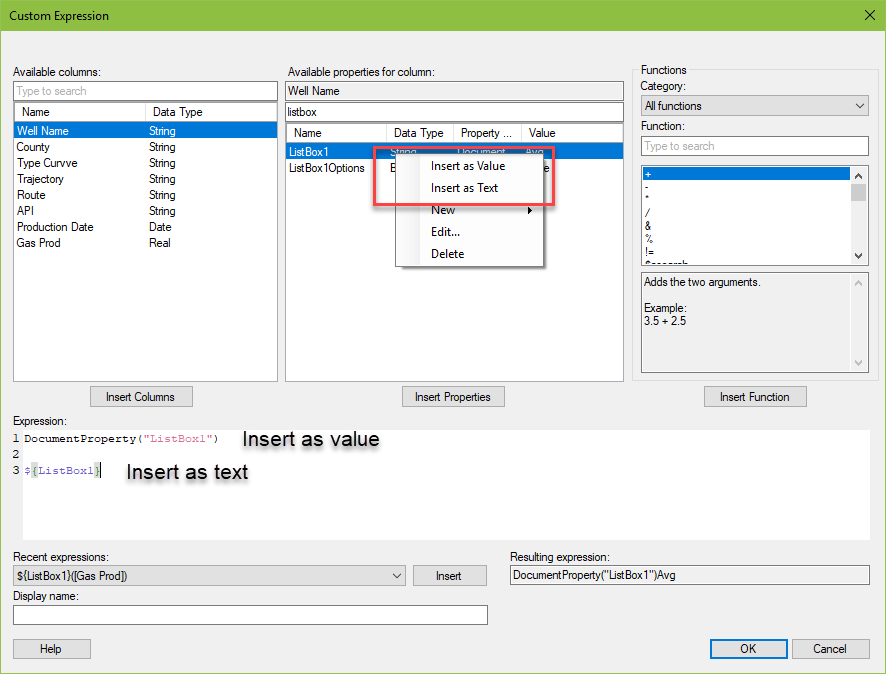
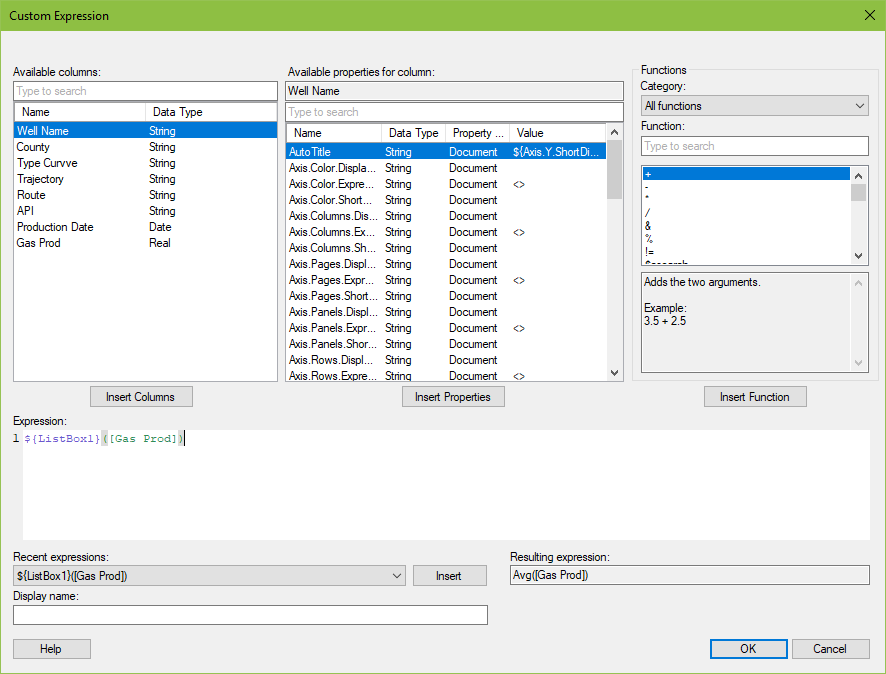
In order to write the syntax, right-click on the y-axis and select Custom Expression. If you know the syntax and the property control name, you can just type it in. Or, you can search for it in the Available properties for column section of the dialog as shown.
When working with document properties, there are two types of syntax, which are shown here after right-clicking on the property and selecting either Insert as Value or Insert as Text. If you double-click the property or click the Insert Properties button, it will insert as text.
When you want to use a string property in an expression where it should be interpreted as a column name or a measure, use the Insert as text syntax. When the value of the property is to be used as part of an expression, use the Insert as value syntax. To learn more, check out the TIBCO documentation.
In this case, even though we are creating an expression, we want the aggregation (Min, Max, Sum) to be read as a string, so we use the Insert as Text syntax.
Spotfire is reading the expression above as … when Sum is selected from the list box.
Sum([Gas Prod])
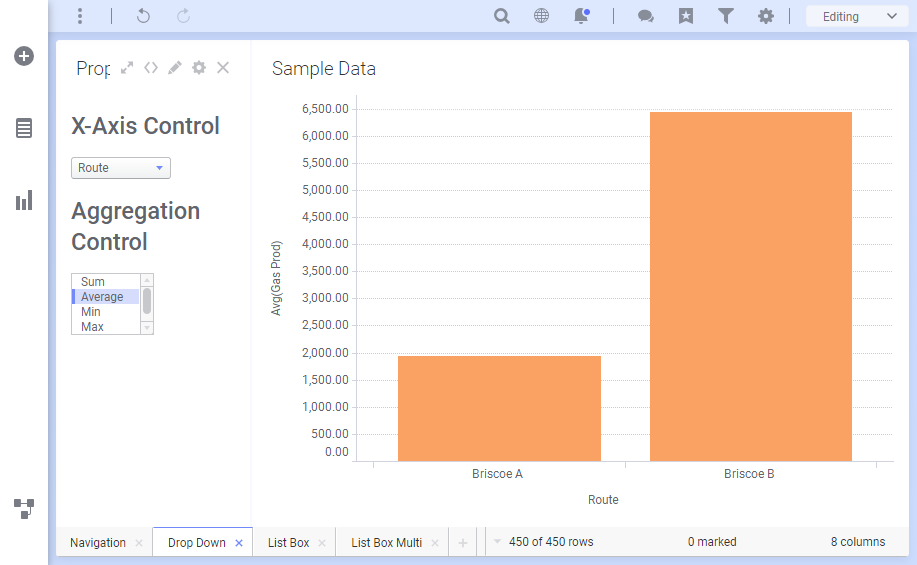
Here is what my final result looks like. And now you know how to use list boxes in Spotfire text areas.

Pingback: Error - Spotfire Could Not Publish » The Analytics Corner
Pingback: How to Use List Box (multiple select) in Spotfire Text Areas » The Analytics Corner
Pingback: How to Use Input Property Controls in Spotfire Text Areas » The Analytics Corner
Pingback: Using Input (multiple lines) Property Controls in Spotfire Text Areas » The Analytics Corner
Pingback: How to Connect A Spotfire Display Name To A Property Control » The Analytics Corner
Pingback: Using Slider Property Controls in Spotfire Text Areas » The Analytics Corner