I am almost done with my series on learning how to use Spotfire property controls. We only have 2 controls left — labels and sliders. In this post, I’ll show you several different ways to use label property controls, and if you are registered for the TIBCO Analytics Forum, tune in to my breakout session for a look at using labels and IronPython scripts together. Read on to learn more about using label property controls in Spotfire.
One Small Favor
It’s always my goal to help people solve problems in Spotfire, and I want my content to be as good as possible. Would you do me one small favor and leave a comment at the bottom ranking this post on a scale of 1 – 10 (1 = horrible, 10 = perfect), and if it’s anything less than 10, tell me what I could do to make it better.

What To Do With It?
In the simplest of terms, label property controls are a container for string values. Once in the container, you can reference the property control in a number of places in the DXP. They can be used in calculated columns, display names, scripts, descriptions, and probably some other places I am forgetting. But, label property controls are slightly different from other property controls in that user’s don’t really interact with them. They are more a vehicle for holding and moving values.
Creating Labels From the Text Area
The steps below show you how to create a label from a text area.
- First, add a Text Area to your page.
- Right-click on the Text Area and select Edit HTML. You can also select Edit Text Area, but once I learned to use HTML and avoid the GUI, I stopped using Edit Text Area.
- Click the Insert Property Control button and select Label.

- Click the New button.
- Name the property control and set the data type for the data you are working with. Labels are most commonly set up as strings, but I can think of a few reasons to set them up as other data types.
- Click OK until you are out of all dialogs.
The steps above create a label in a text area, which makes it visible to the user. If you don’t want the user to see the label, create it from the Document Properties menu instead using the instructions below.
Creating Labels from Document Properties Menu
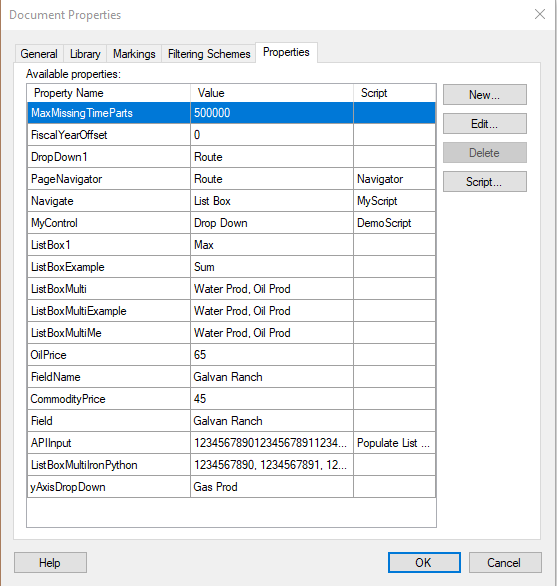
- Go to the File menu and select Document Properties.
- Go to the Properties tab.
- Click the New button.
- Name your document property and set the data type.
- Enter a value for the label.
I’m sure you noticed that using this method, you did not specify the property control as a label. That’s true. But, using this method, you create a container to hold a value, which is what a label is anyway. Now that you know how to create label property controls, let’s talk about using them.
Using Labels
Labels can be referenced in a lot of places, including….
- Titles
- Descriptions
- Calculation logic
- IronPython scripts
- R scripts
- Python scripts
- Data limiting with expression
One of my all-time favorite uses of labels is this post, where I explain how to use label document properties to control data limiting with expression. My second favorite use of this is in IronPython scripting.
Labels in IronPython Scripts
In the sample shown below, I have a drop down property control that will set the value of the X-Axis. The drop down options are Well Completion Name, API, Aries PropNum, and Well Completion EKey. The last 3 options are all well identifiers, as opposed to the well completion name.
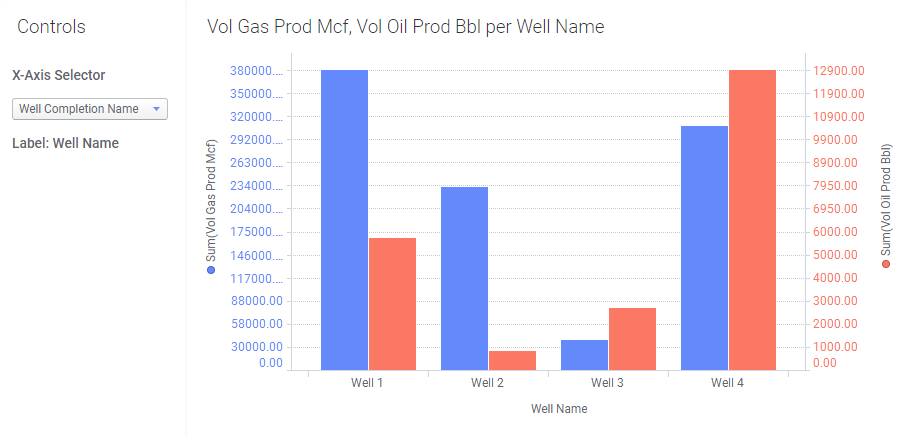
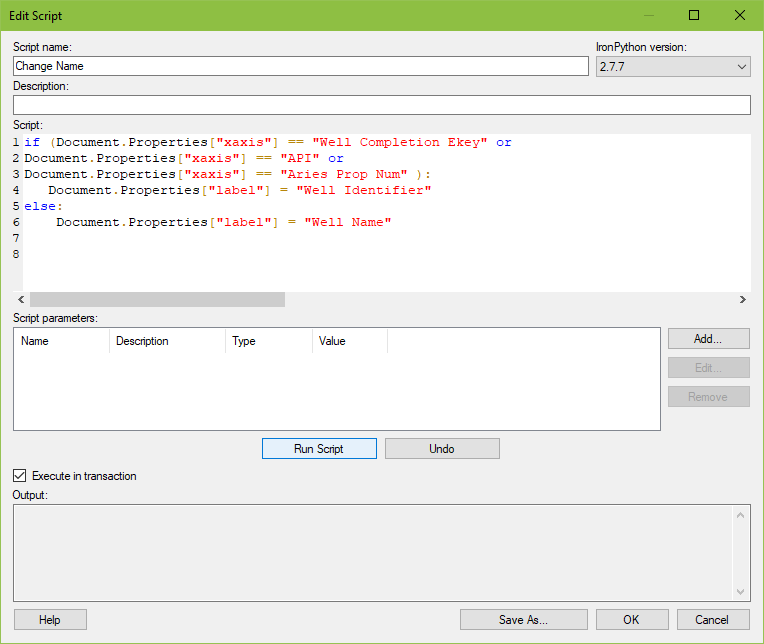
I would like to change the x-axis display name to “Well Name” if the first drop down option is chosen. If any of the other drop down options are selected, the display name should be set to “Well Identifier” instead. We accomplish this by first creating a label property control (called label). Then, I use very simple “IF” logic in an IronPython script to populate the label property control based on the value in the drop down property control (called xaxis).
If the user selects “Well Completion EKey”, “API”, or “Aries Prop Num”, the label will update with “Well Identifier”. If the user selects Well Completion Name (the only other option), the label will update with “Well Name”.
The script attaches to the drop down and runs any time the drop down value changes.
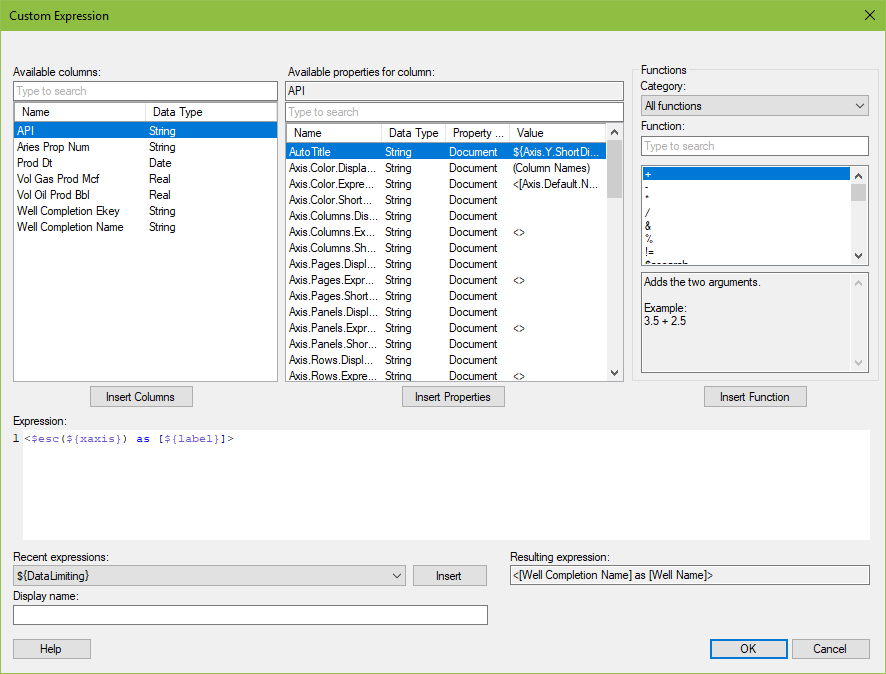
From there, we apply a customer expression on the x-axis to populate the display name using the value in the label property control. The $esc function places square brackets around the contents of the xaxis drop down property control so that Spotfire interprets it as a column name. Then, the expression references the label property control after the as keyword.
Potential Pitfalls
Because the expression is written on the x-axis using a categorical column of data, the expression needs to be bookended with “<” and “>”. If you don’t have this syntax, Spotfire will interpret the data as continuous, and the bar chart will show up tall and skinny. No one likes this chart.

If you place the “>” sign before the as keyword, as I did the first time I tried this, Spotfire will throw an error. The “>” sign must be placed after the reference to the label property control as shown above.

Other Uses
When using the label document property in other places, like titles, descriptions, or calculated columns, use the same syntax — dollar sign, squiggly brackets, property name.
And now you know all about using label property controls in Spotfire. Stay tuned next week for the final post in the series on using slider property controls. Thanks and have a great weekend!
Other Sweet Spotfire Content
Check out my series on learning to use property controls.
Pingback: How to Format Visualizations With IronPython » The Analytics Corner